
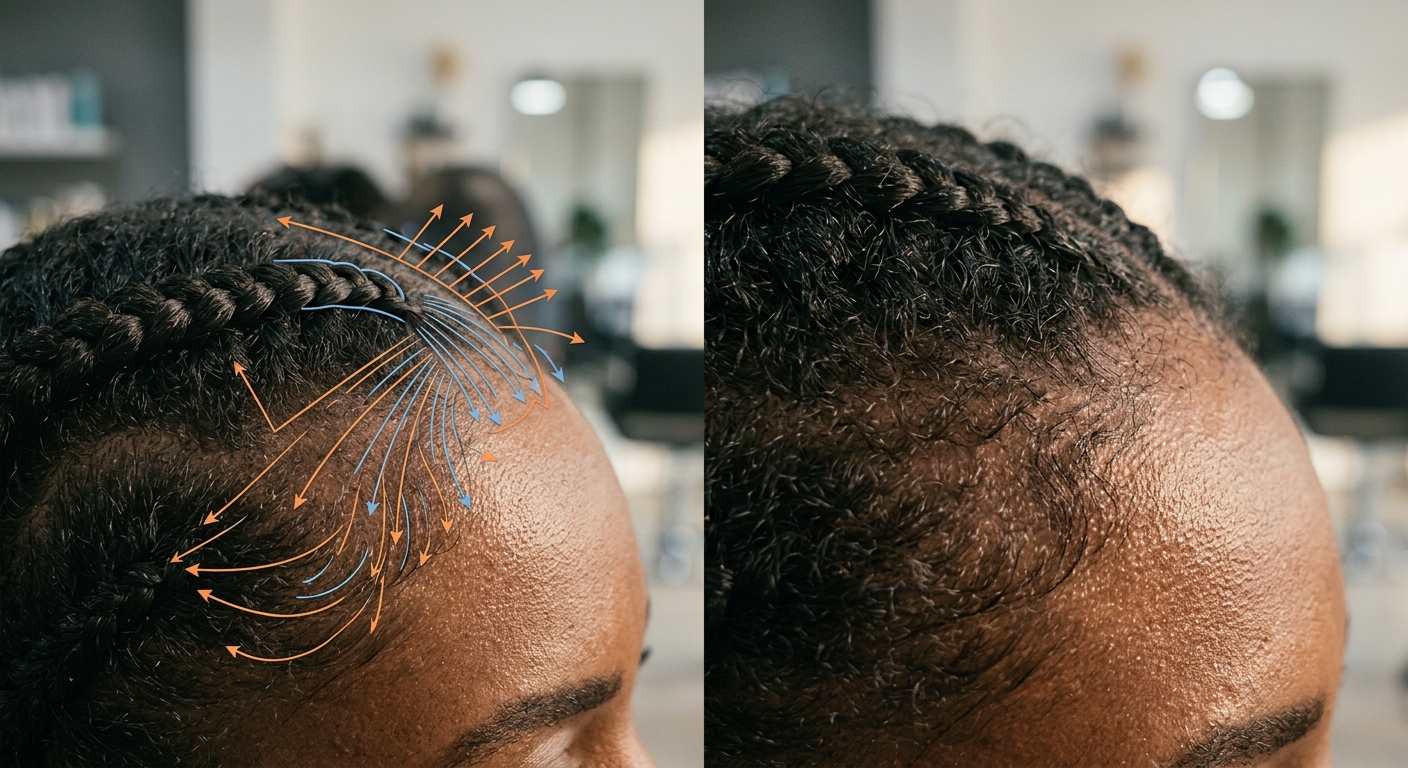
Do you need pain relievers to sleep after getting your hair braided? Scalp pain is never normal. Tender red bumps, persistent itching, and headaches signal that hair follicles are undergoing acute mechanical trauma beneath the extensions. When braiders anchor heavy synthetic hair directly onto fine baby hairs (especially around the temples), blood circulation slows down around the root. Follicles suffocate under that pressure. Over time, repeated pulling produces permanent thinning. Che explains how licensed cosmetologists use gentle, tension-free parting to safeguard tender hairlines while giving you long-lasting protective styles.
The Clinical Reality of Mechanical Tension: Can Tight Braids Cause Permanent Hair Loss?
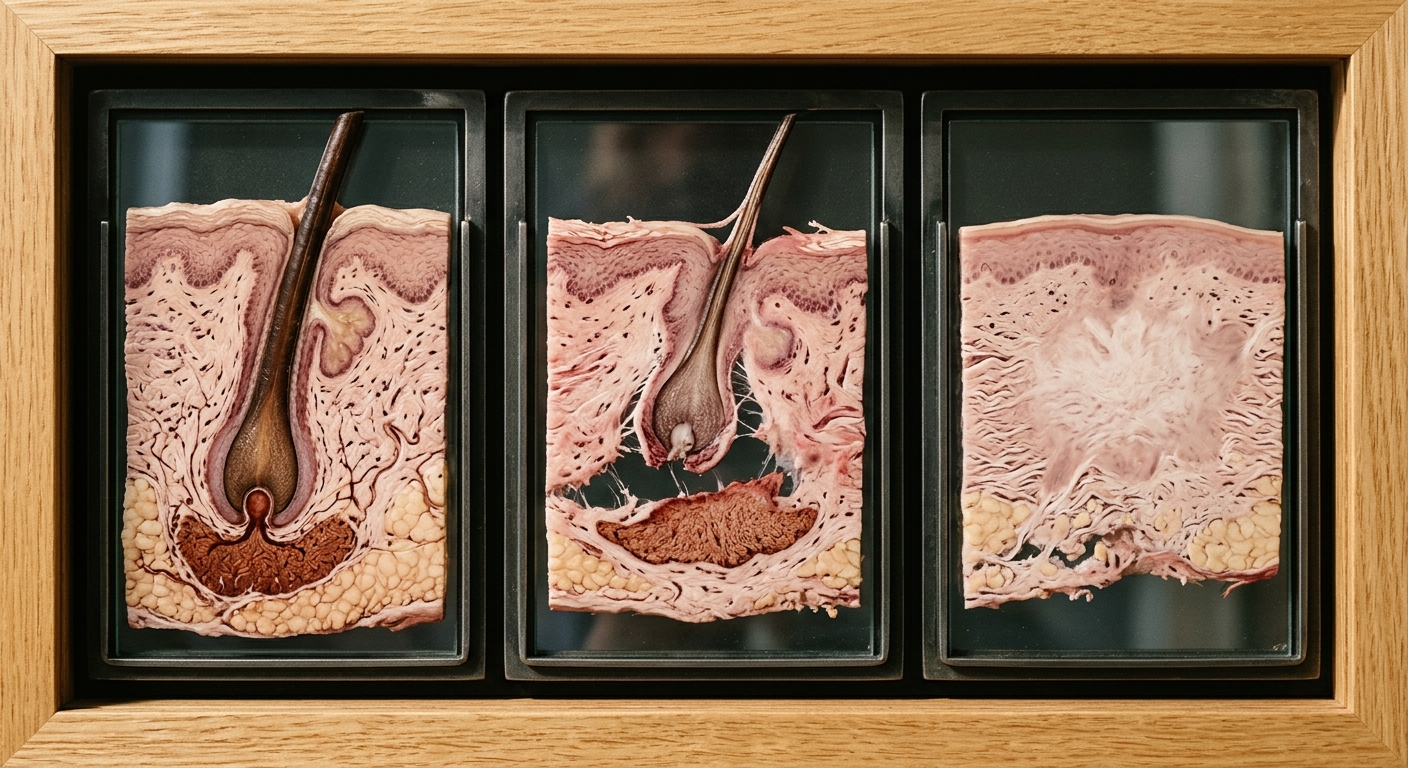
Tight braids do not hold styles longer. They strangle the root. When an installation pulls hair past its elastic limit, the root sheath separates from the follicle wall. Many clients take pain medication after a salon appointment and treat that throbbing ache as proof of a secure foundation. It is not. That ache signals active tissue distress.
What Constant Pulling Does to Your Hair Roots
What happens beneath the surface during an aggressive braid down? Continuous mechanical pull compresses local capillary beds. Constant pulling can reduce blood flow around the hair root, which stresses the follicle over time. A stressed follicle can stop growing hair early and slowly shrink. If the pulling continues for a long time, scarring can make hair loss permanent. That destruction extinguishes the capacity to grow new hair in cases of advanced traction alopecia.
Why Anchor Cornrows Bear Compound Force
Weight distribution determines the severity of follicular strain. A single box braid moves with your head, while base braids must support static accessory loads. Base cornrows under wigs and sew-in weaves face compound forces:
- They hold heavy synthetic bundles directly against thin perimeter hair.
- They endure continuous friction from wig caps and elastic bands.
- They concentrate tension on fragile temporal zones rather than spreading it across the crown.
True traction alopecia prevention starts by eliminating this compound mechanical pull before the damage becomes irreversible. Learning how to protect your hairline requires knowing your scalp’s physical limits.
Follicle Resilience Across Curl Patterns and Hair Porosity
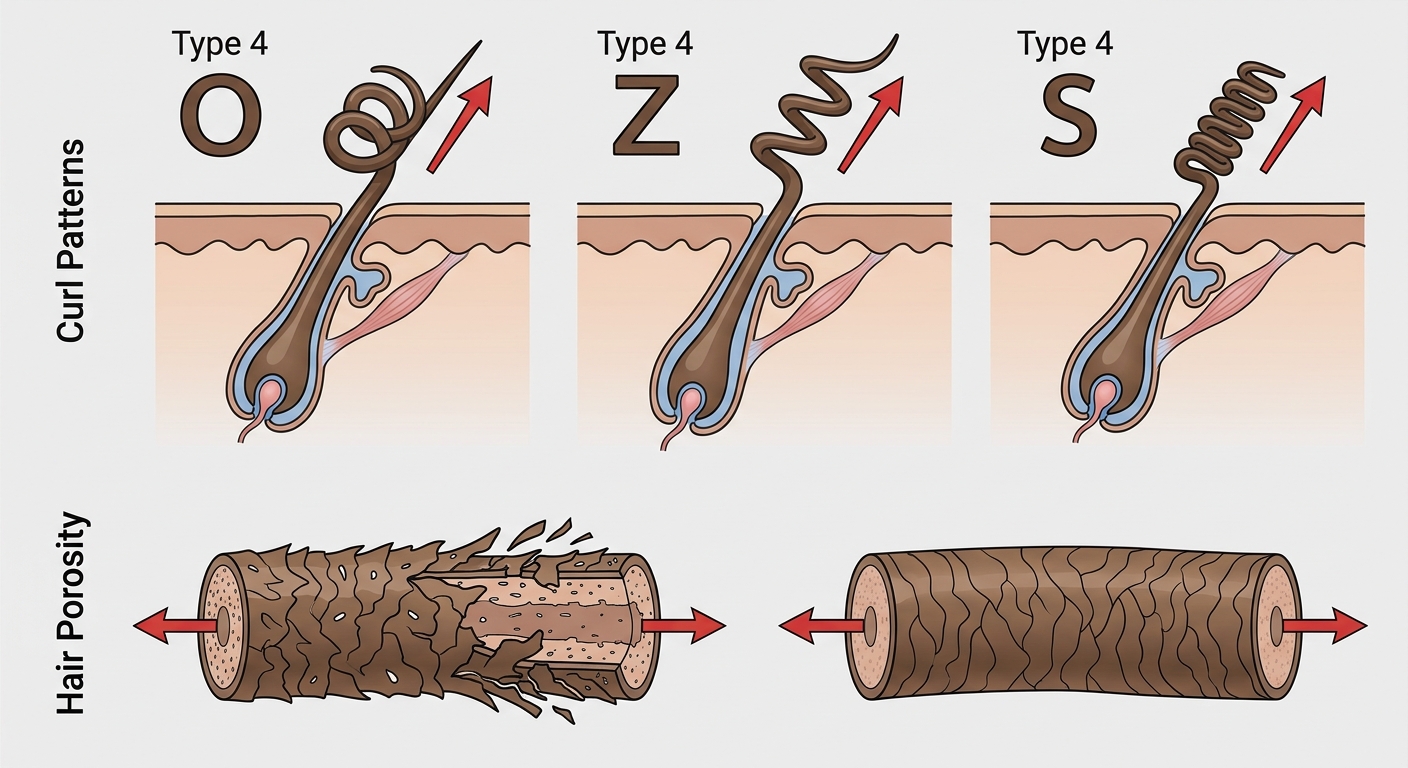
Hair strands differ in structural strength. Follicles producing tight, coiled curl patterns (Type 4 hair) have an elliptical cross-section and emerge from curved follicular bulbs beneath the scalp. This anatomical curve makes coiled hair naturally prone to breakage when subjected to unidirectional shear forces. In contrast, looser curl patterns (Type 2 and Type 3 hair) grow from rounder or slightly oval follicles anchored more evenly in the dermis. Tight braiding pulls coiled roots at an angle contrary to their natural growth trajectory, which magnifies root detachment.
Porosity determines how moisture retention affects hair elasticity:
- High porosity hair has raised cuticles that rapidly absorb and lose moisture. Under tension, dry high-porosity fibers snap near the root because they lack tensile elasticity.
- Medium porosity hair has a balanced cuticle layer and some natural stretch. It withstands moderate styling strain but remains vulnerable to chronic compression.
- Low porosity hair has tightly packed cuticle scales that resist product absorption. While individual fibers have high tensile resistance, excessive mechanical pulling forces the entire root out of the dermal pocket rather than snapping the shaft.
Fine hair strands with low density represent the highest risk profile for traction loss. When a braider attaches heavy synthetic extensions to fine coiled strands, the weight-to-follicle ratio becomes dangerous. Stylists must adjust parting sizes according to individual strand diameter rather than applying uniform grid spacing across the whole head.
Comparative Symptom Reference: Reversible Tension vs. Cicatricial Damage
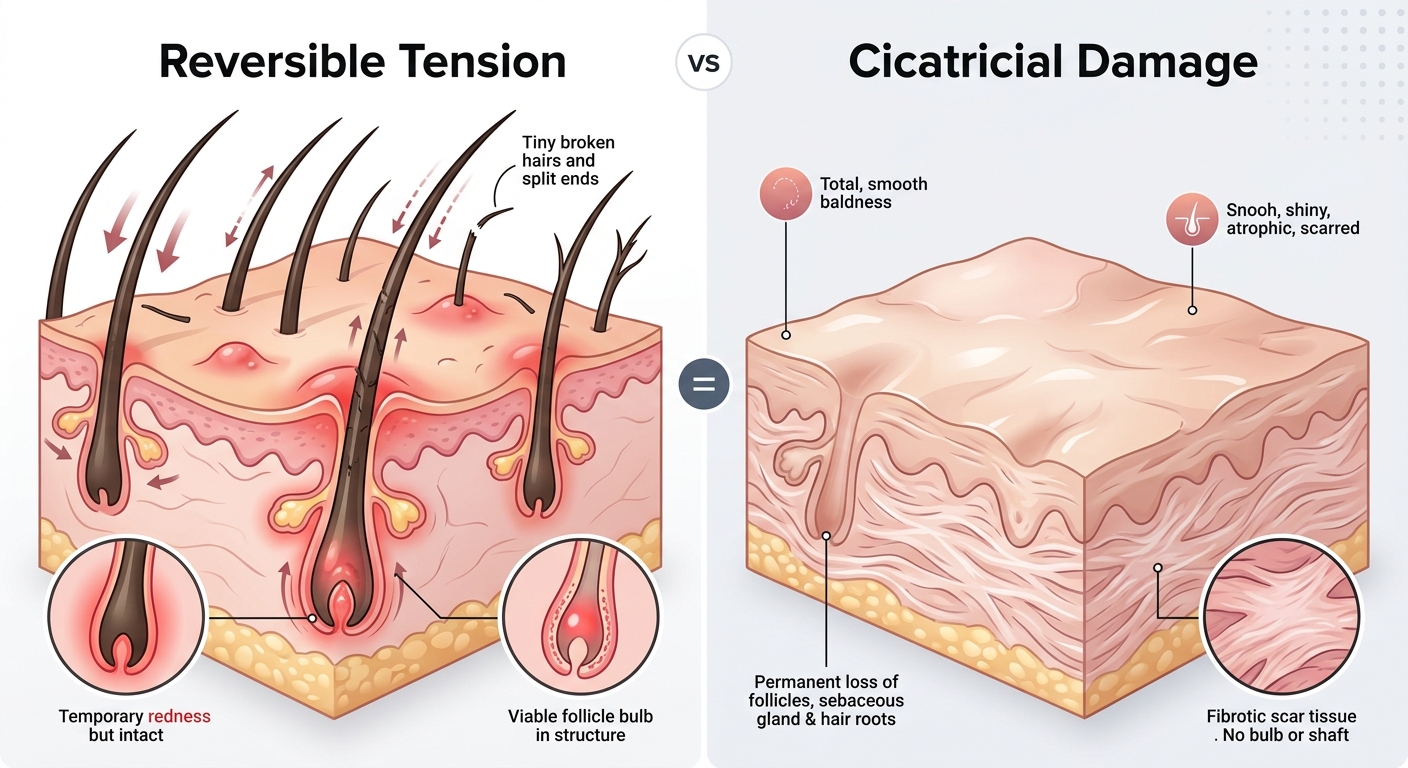
Recognizing the difference between temporary inflammation and permanent scarring determines whether you can regrow lost edges. Catching damage early gives your hair the best chance to recover.
Early-Stage Reversible Traction Markers
- Skin that lifts into tiny peaks around the base of each braid
- Clusters of red tension bumps that appear within a day or two of braiding
- Mild tenderness that subsides once you relieve tensile pressure
- Casts and white bulbs sliding along the shaft without skin atrophy
- Hair often has a good chance of growing back when tension is removed early
Late-Stage Cicatricial (Scarring) Traction Markers
- Smooth, shiny skin along the hairline with absent follicular openings
- Complete loss of fine vellus baby hairs across the temporal zone
- Balled fibrotic tissue visible beneath dermoscopy
- Permanent widening of part lines that persists six months after style removal
- Regrowth may not be possible at this stage, so see a dermatologist for a diagnosis and options
Early Warning Signs: Tented Skin and Tension Bumps
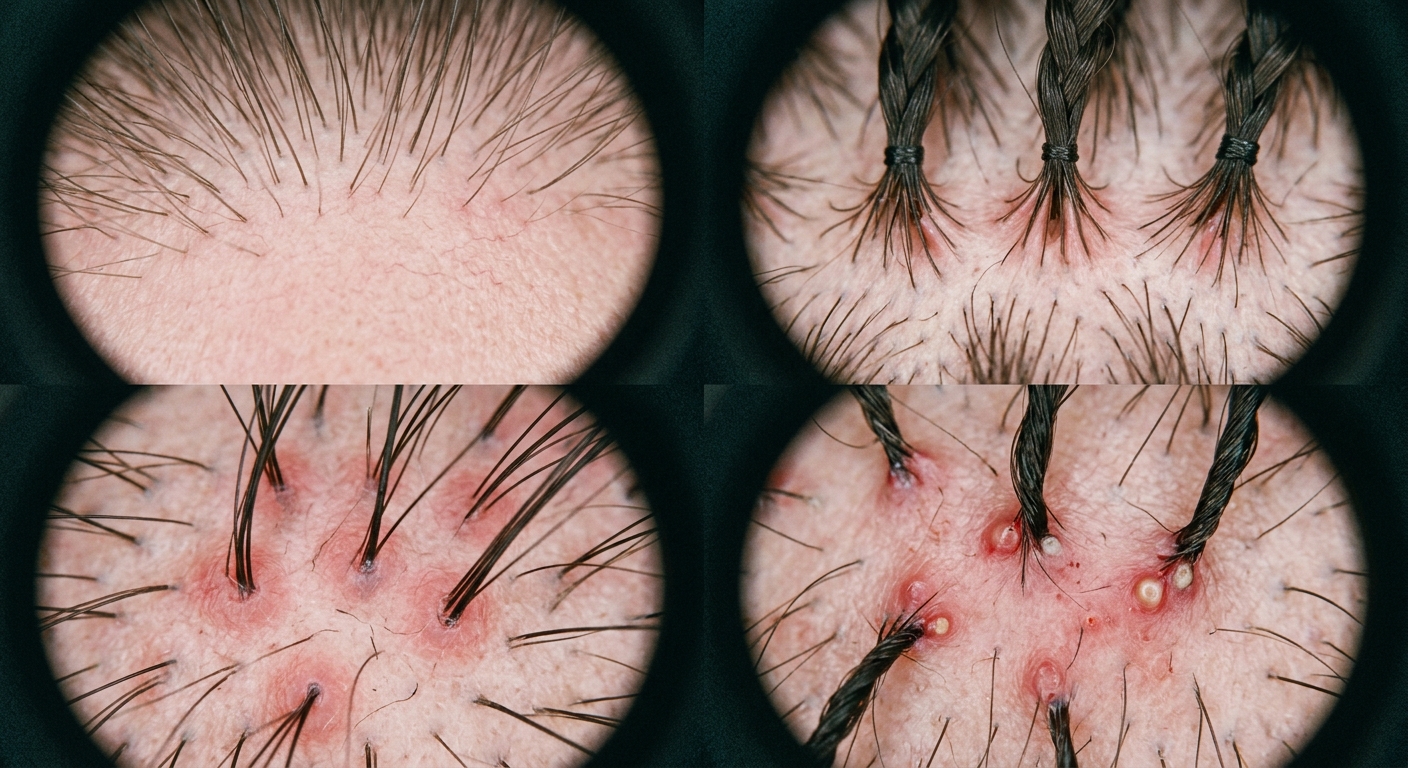
Your scalp reveals distress immediately. You may see red rings of irritation around individual hairs, sometimes with small, pus-filled tension bumps, within a day or two of a fresh install. If bumps or soreness last, see a dermatologist. Have you noticed the skin lifting slightly where each braid starts? That tented look means the braids are pulling the skin around each root into tiny peaks. When the surface lifts into a tent, mechanical load has exceeded tissue tolerance.
Perimeter Vulnerability and Warning Signs
Hair along your temporal hairline and nape sits inside shallower subcutaneous tissue than hair on the crown. Because these fine perimeter strands lack deep anchoring, they succumb first under aggressive weaving techniques. You can spot the earliest markers right at home before visible thinning begins.
Examine your scalp under bright lighting forty-eight hours after any sew in or braid down installation. Look for these specific changes:
- Raised skin cones along exposed part lines or perimeter rows
- Clusters of red pustules hugging the temple borders and behind the ears
- Scalp soreness that throbs whenever you smile, chew, or blink
- Follicular sheaths or white bulbs sliding upward along the braided shaft
Do not accept these symptoms as normal costs of a sleek style. If you spot tented skin or tension bumps around your hairline, contact your stylist right away to have the braids loosened.
The Wig Foundation Dilemma: Friction Caps and Cornrow Bases
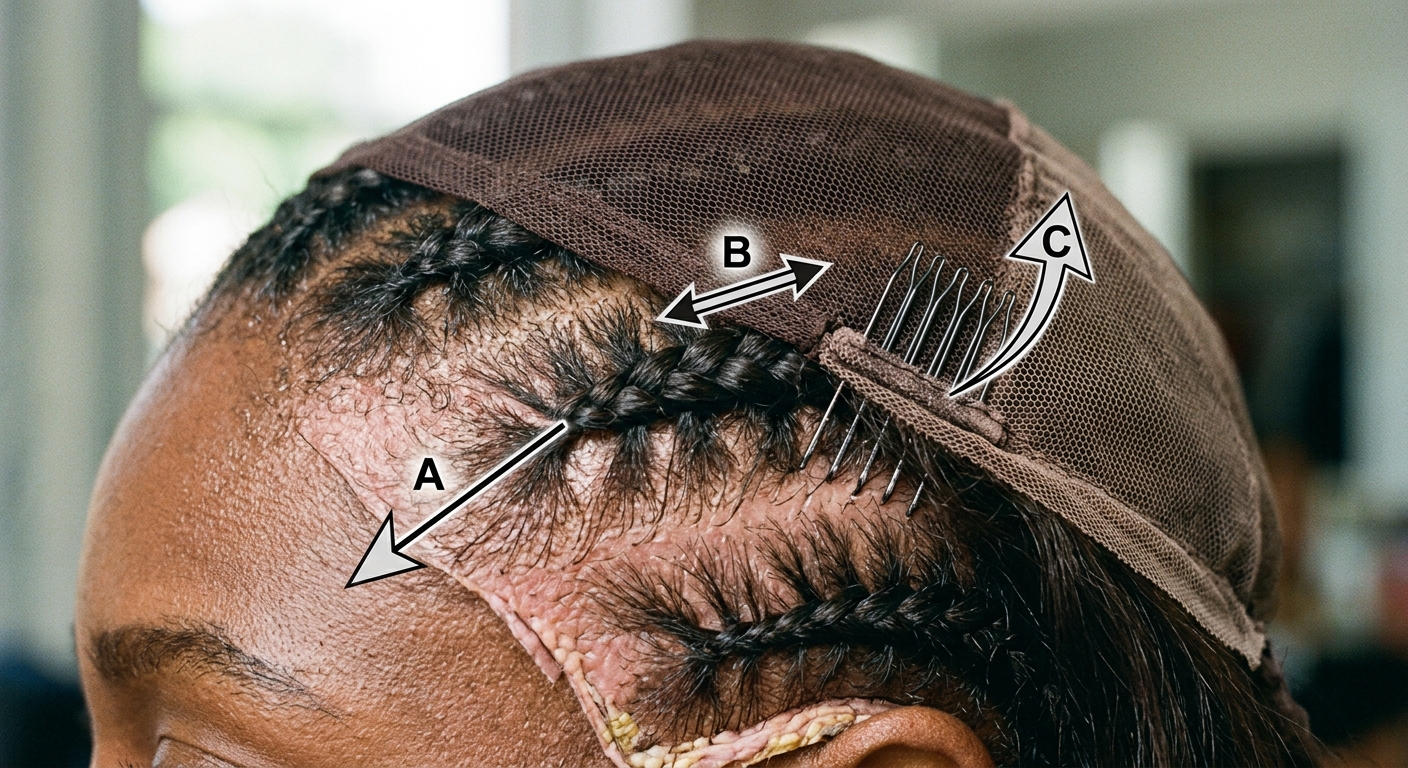
Nylon stocking caps and elastic grip bands do not sit passively over a braid down. They move. Every turn of your neck causes cap fabric to slide microscopically against the skin, creating constant abrasive shear. When an elastic band rests over a border braid that is already braided taut against the scalp, two separate physical loads strike the follicle at once: direct tensile pulling from the cornrow and continuous lateral friction from the shifting cap.
The Double-Stress Dynamic: Anchor Cornrows Plus Cap Friction
Wig wearers often face persistent edge thinning without identifying the true culprit. Does achieving a flat lace melt really require an agonizingly tight braid pattern? Clients dread bulky foundations that push a lace front upward. To avoid that bump, braiders without formal trichology training grip fine perimeter hairs with excessive hand tension, flattening the foundation through brute force rather than strategic sectioning. This habit trades long-term root health for temporary flatness.
The Danger of Anchor Tracks on the Fragile Frontal Perimeter
Sewing heavy tracks or snapping metal combs directly into thin perimeter rows multiplies this strain. A dense wig can add noticeable weight. That hanging mass pulls downward all day. When you secure that weight directly to fine border rows using non-stretch nylon thread, the braids act as rigid levers against sensitive root structures (particularly around the forehead and sides). The anchor rows bear the burden of every head movement. Over several weeks, this constant dragging force dislodges hair fibers from their beds before the natural shedding cycle begins. Exploring protective styling alternatives protects against this damage.
The Licensed Cosmetologist Solution: Che’s Zero-Tension Micro-Slack Braiding Method
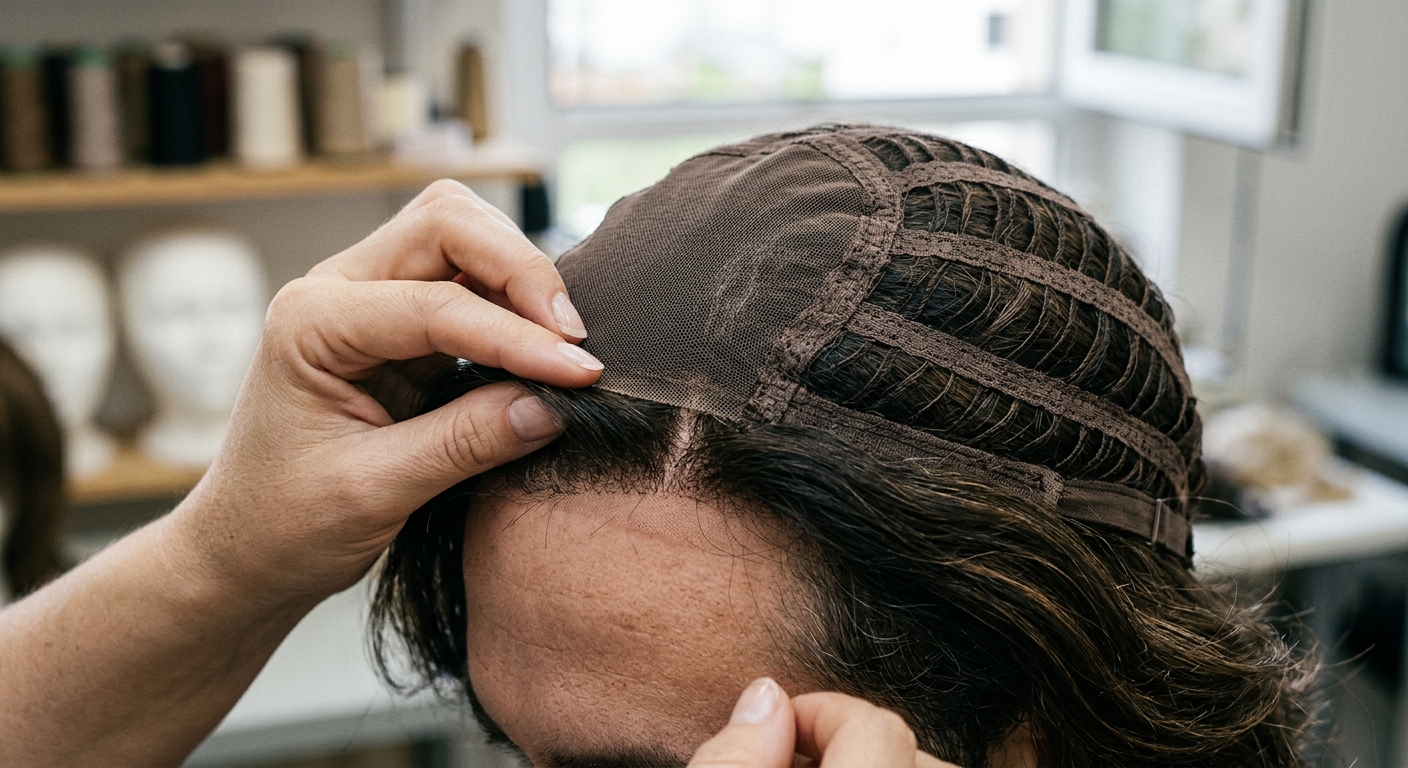
Flat braid foundations do not require intense pulling. Che approaches base preparation through scalp biology rather than brute force.
The Micro-Slack Braiding Method
Can protective styling hold firmly without tugging at the scalp? Che leaves a little ease at the root so your hair can move naturally as you turn your head. This tiny space allows hair fibers to flex during ordinary head movement. Unlicensed braiders wrench that initial crossover tight against the skull to force a flat profile. That habit strains root anchors. Che achieves smooth, low-profile foundations through precise parting and disciplined hand positioning instead.
Contoured Pathways and Edge Isolation
Tension management also relies on parting geometry. Traditional straight tracks focus the downward pull of heavy hair bundles onto narrow strips of skin. Che shapes contoured, curved braid pathways that follow the natural slope of the skull. These ergonomic curves distribute directional weight across broader cranial planes, keeping individual hair groupings safe from concentrated strain.
Perimeter hair receives specialized handling:
- Fine baby hairs remain entirely excluded from load-bearing cornrows.
- Gentle, water-based styling gels smooth perimeter edges without pinning them beneath structural thread or extension hair.
If you are already sitting with an uncomfortably tight install right now, immediate intervention is necessary to halt ongoing follicle trauma.
Emergency Rescue: How to Soothe Tight Cornrows and Repair Edges
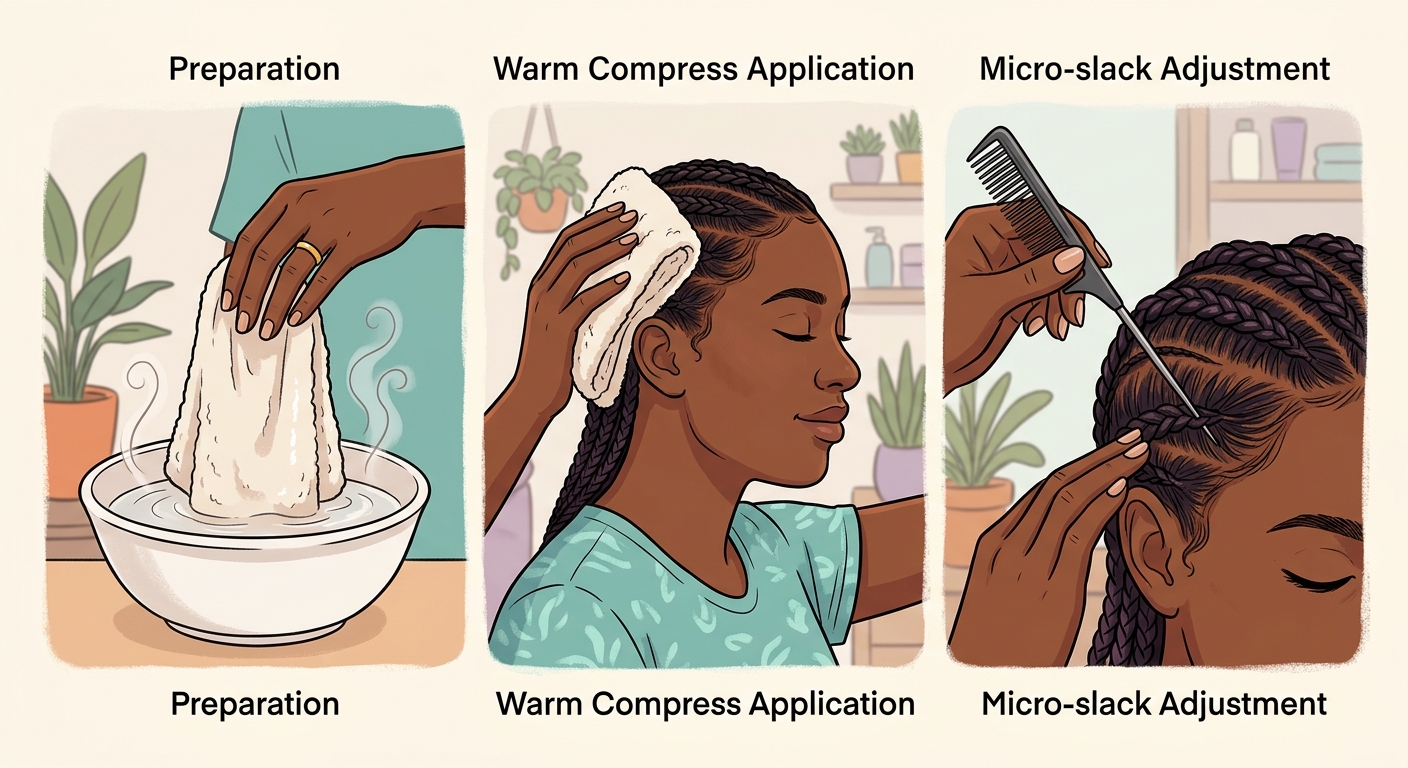
Pain is an active injury signal, not an entry fee for a fresh install. When braids feel tight across your temples right after an appointment, it helps to know how to soothe tight cornrows before the strain damages your edges.
Immediate At-Home Relief for Throbbing Roots
Soak a clean washcloth in warm water, wring it out completely, and press it gently against the taut sections for five minutes. The damp heat softens the synthetic hair fibers and relaxes the skin around each follicle. You can also stand under indirect shower steam for ten minutes. Follow this with a lightweight botanical oil (such as jojoba or squalane) massaged lightly with your fingertips. Do not use heavy grease, which traps sweat and clogs already irritated pores.
If localized pain persists, apply a cold witch hazel compress with a cotton pad to constrict dilated capillaries. If the braids still feel painfully tight, have your stylist loosen them rather than prying at them yourself.
Step-by-Step Edge Repair Protocol
If you have already experienced shedding from tight installations, execute this clinical restoration routine:
- Remove all mechanical load by taking down the braids immediately.
- Cleanse the scalp with a clarifying, sulfate-free shampoo to purge bacterial accumulation from tension bumps.
- Ask a dermatologist before starting any serum or treatment for thinning edges.
- Gentle scalp massage with a light oil can feel soothing, but it is not a proven treatment for hair loss.
- Leave perimeter hair entirely free of edge control gels, headbands, or wig combs for six full weeks.
Consulting our edge restoration guide provides continuous support throughout your recovery.
Frequently Asked Questions About Braid Tension and Scalp Safety
What is the maximum safe install duration for a wig braid base?
A cornrow base beneath a wig unit should remain installed for no longer than four to six weeks. After four weeks, natural shedding (which averages fifty to one hundred strands per day) remains trapped within the braid plait. This accumulated dead hair adds weight, while new growth shifts the braid anchor further from the scalp, turning every turn of the head into a severe mechanical lever against roots.
What are safe weight thresholds for synthetic extension hair?
Your braids should feel light enough that your scalp and neck stay comfortable. If your hair is fine or thin, ask your stylist about using less added hair and larger parts. Braids that double the natural weight of your head place extreme strain on the neck muscles and temporal follicles.
How can I safely wash my hair while wearing cornrows?
Dilute a sulfate-free shampoo with water inside an applicator bottle (using one part shampoo to three parts warm water). Apply the mixture directly down the exposed part lines without rubbing the braids vigorously. Rinse thoroughly by letting the water stream run downward from crown to nape. Blot excess moisture with a microfiber towel and dry the scalp completely with a hooded or bonnet dryer on cool air to prevent fungal buildup.
How should I speak to my braider about pain during an appointment?
Speak up the moment you feel discomfort during the very first braid. Tell your stylist clearly: “That braid feels too tight at the root; please leave some slack on my hairline.” Professional stylists appreciate early feedback because loosening a fresh stitch takes ten seconds, whereas remaking a finished head takes hours. If a braider dismisses your pain or tells you that tightness is necessary, end the appointment. Your hairline is irreplaceable.
Protecting Your Edges Starts with Zero Tension
Tension is never an acceptable standard. When a fresh install throbs or forces you to reach for painkillers before bed, your follicles are enduring mechanical trauma. A protective style must preserve your natural hair without causing headaches, tight pulling, or tender temples. If your scalp stings when you blink or smile, the braids are simply too tight.
Soreness that does not go away is a sign your roots are under stress. That repeated strain can quickly turn temporary shedding into permanent traction alopecia. Listen to your body. Soreness is an emergency signal warning you of active damage.
At SlayyByChe, Che crafts camera-ready braid foundations using balanced sectioning and gentle tension that protects your delicate perimeter from chronic stress. You receive a remarkably flat base for your styles alongside clinical hair preservation. Book your tension-free braid down appointment at SlayyByChe today to protect your edges.
Ready for a low-tension style done one-on-one? Book your appointment at Slayy By Che.