
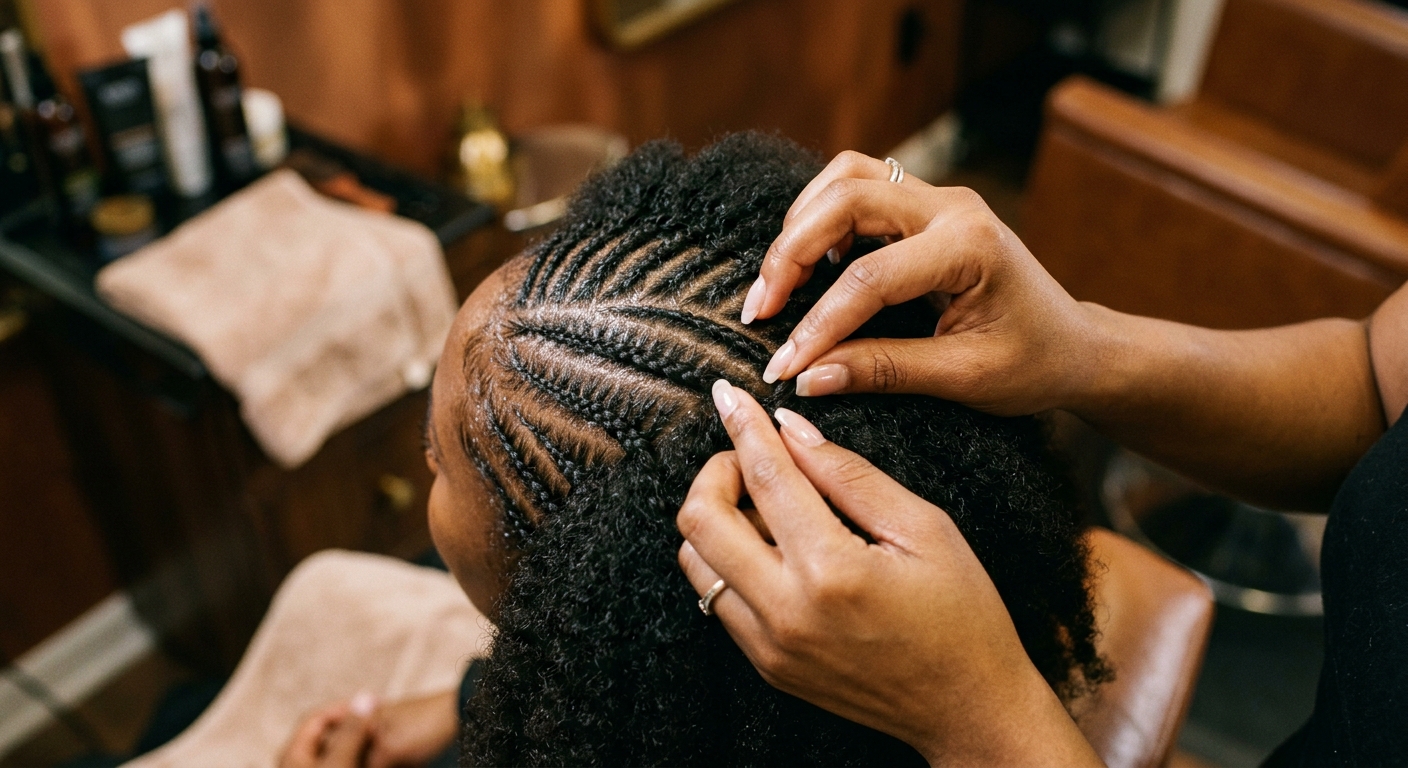
Why do stylists tell clients that a tight braid down means a longer-lasting wig install? Pain is not security. When cornrows pull tightly against delicate temple hair, they inflame the follicle and cause slow thinning. A proper flat braid down for a wig creates a smooth base, especially around the hairline, by adjusting braid angles rather than pulling on tender baby hairs. Deliberate parting grids, herbal scalp oils, and tensionless anchor stitches keep your natural hair thriving under your favorite unit.
Quick Navigation
- Why Braid Downs Dictate Silhouette and Scalp Health
- The Engineering of Cranial Contour Mapping
- Mastering the Tension-Free Perimeter
- Scalp Care and Microbiome Preservation
- Step-by-Step Preparation and Home Maintenance
- Customized Braid Patterns by Install Type
- Booking a Specialist in Jonesboro and South Atlanta
- Frequently Asked Questions
Why Your Braid Down Dictates Your Wig Silhouette and Scalp Health
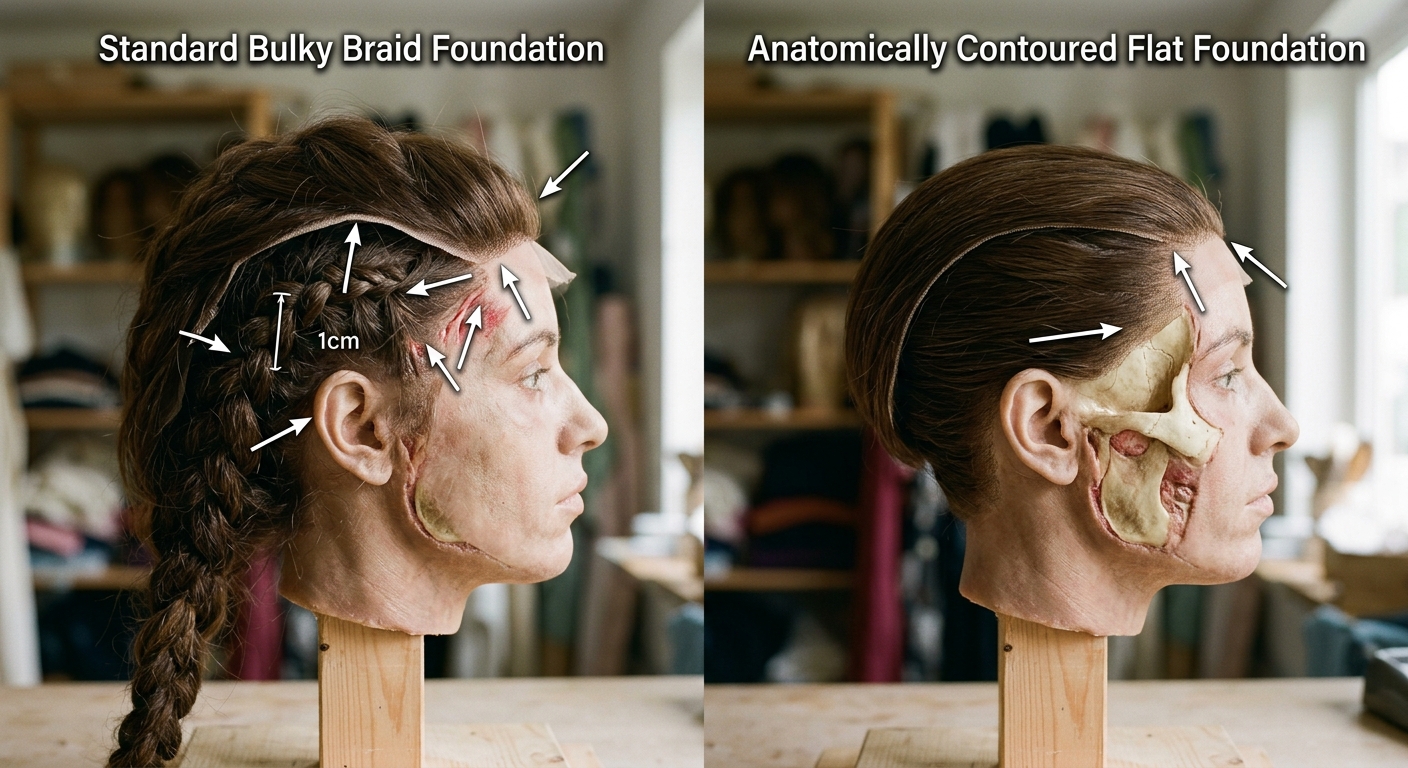
Your lace front sits directly on whatever sits underneath it. If the base below is uneven, the wig looks bulky no matter how carefully you melted the lace or plucked the front. A well-done braid down builds the foundation for the entire wig. When the braids underneath follow the natural contours of your head, the wig lays flat, moves naturally, and protects your natural hair from friction.
The Anatomy of the Dreaded ‘Cone-Head’ Effect
Heavy bulk at the crown apex creates an unnatural conical silhouette. This distortion happens when braiders overlap thick braided ends near the top of the skull rather than distributing the bulk down toward the nape. Lace cannot sit flush when raised cornrows push upward against the cap. No wax stick or hot comb can flatten a foundation that was built too high.
Tension Alopecia and the South Metro Humidity Factor
Tight edges do not secure an install. When braiders pull fragile baby hairs into high-tension anchor cornrows, they damage follicle beds (often triggering traction alopecia after repeated appointments). The danger multiplies under local climate conditions. Summer in Clayton and Henry counties brings intense humidity that traps sweat beneath dense stocking caps. Without clean partings that promote airflow to the scalp microbiome, that trapped moisture breaks down lace adhesives and feeds fungal irritation. True scalp protection demands structural spacing that lets skin breathe while keeping hair anchored.
The Engineering of Cranial Contour Mapping for Flat Foundations
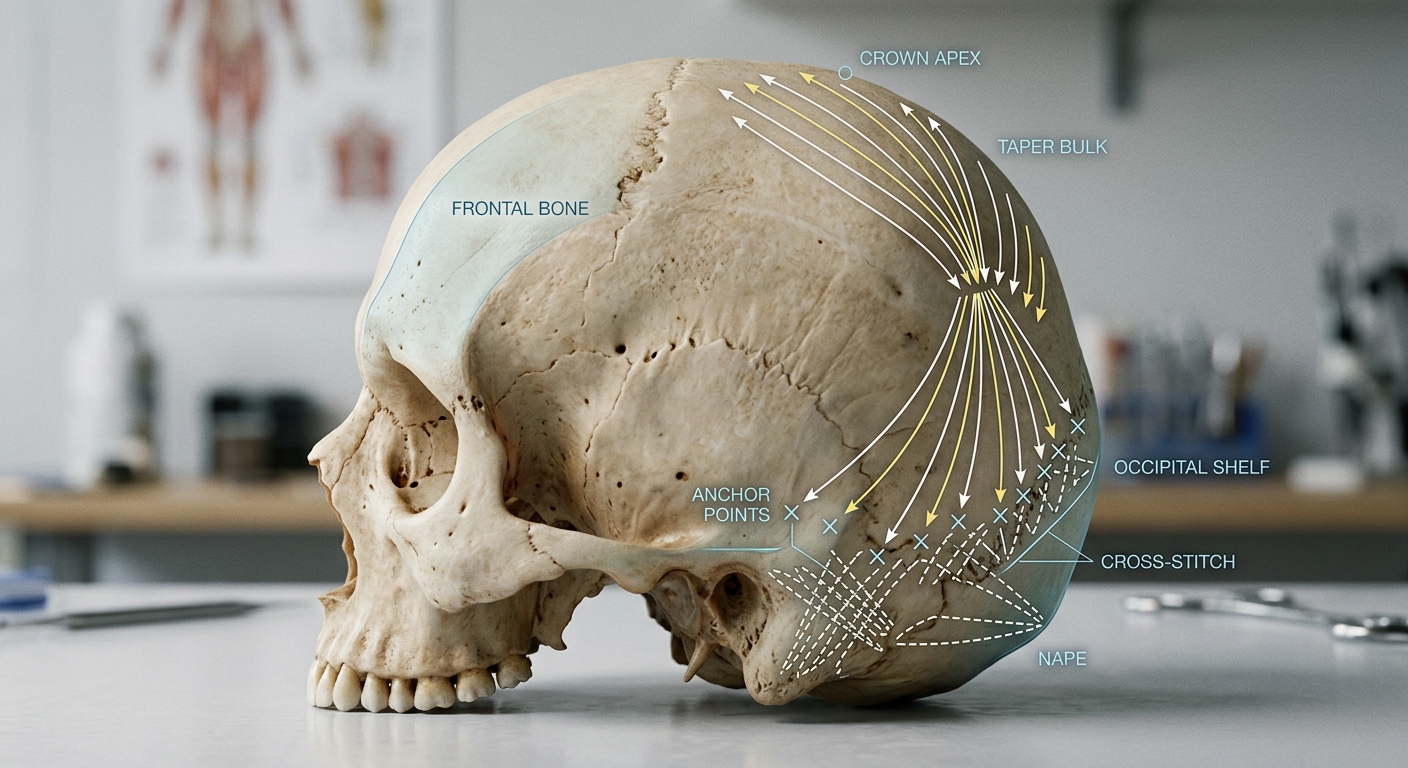
Every head possesses distinct ridges, valleys, and curves that alter how a wig cap settles. Stylists should feel the shape of your head, including the back of the skull and the temples, before parting. What happens when you skip this tactile assessment? Braids crowd over natural protrusions. That crowding forces the wig base to buckle.
Mapping the Occipital Shelf and Temporal Depressions
Density rarely distributes evenly across natural hair (particularly with tight 4C textures). Sparser temples and thick crowns require deliberate recalibration. To keep the cap flush, parting widths must shift according to local follicle concentration rather than rigid symmetry. We widen row bases across sparser patches and narrow them through heavy zones. Doing so spreads hair mass sideways across the skull curve, preventing the thick center ridge that common straight-back cornrows produce.
Density Adjustments and Nape Tapering
Bulk at the base of the neck compromises the fit of glueless units. When cornrows remain thick at the neckline, the bottom band of the wig lacks a flat surface to grip. The hair then rolls upward when you tilt your chin. Braiders must taper each stitch smaller as the plait reaches the nape, feeding loose ends horizontally across the base rather than folding them into thick lumps.
- Tapered row ends rest flush inside the lower neck depression.
- Graduated stitch tension distributes volume evenly across the cranium.
- Adjusted part widths protect postpartum thinning spots from strain.
Proper structural mapping keeps your unit anchored through daily head motion.
Mastering the Tension-Free Braid Down: Perimeter Preservation
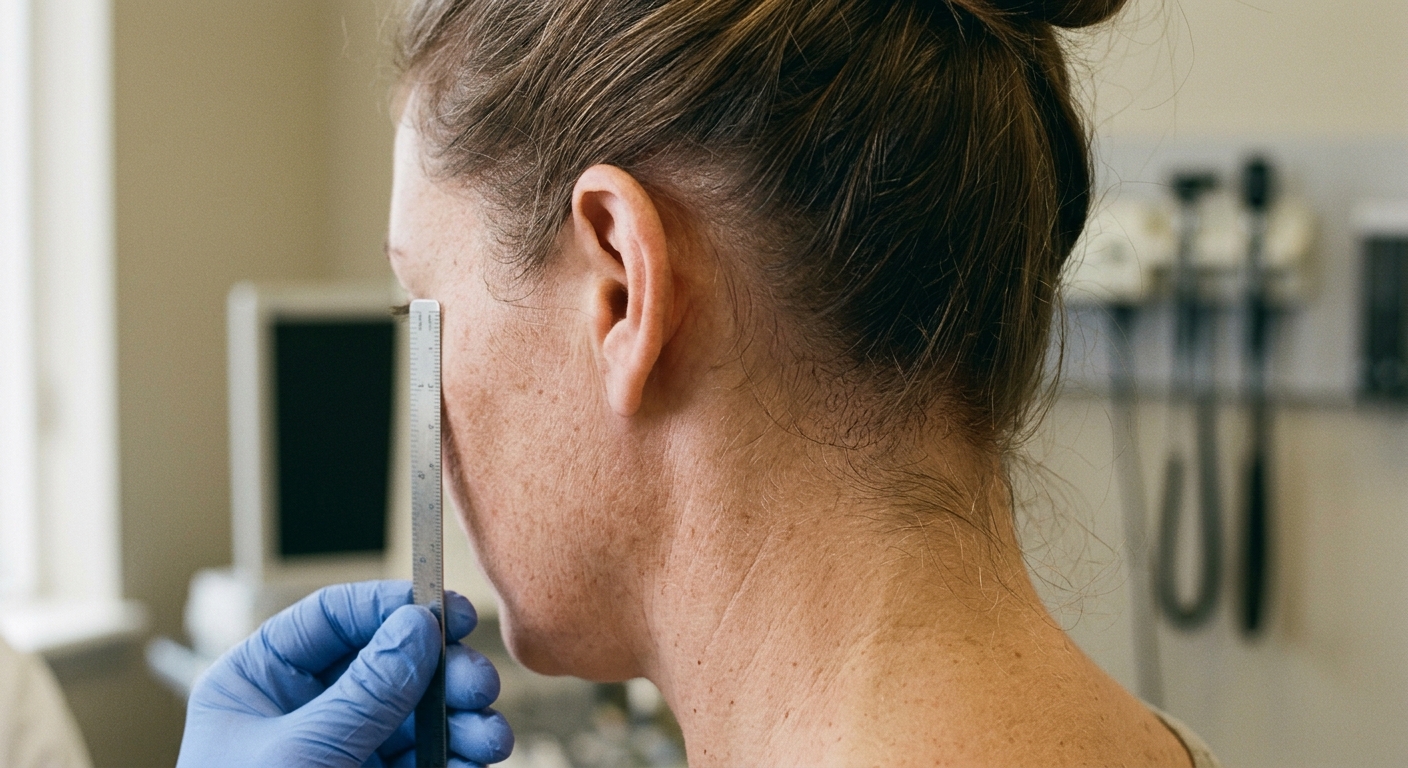
Tension damage rarely begins at the thickest part of the scalp. It starts along the micro-fine hairs framing the face (the fragile transition zone between bare skin and dense growth). Braiders prevent follicle loss by setting the initial stitch a quarter-inch behind the natural hairline rather than gripping every stray edge.
Zero-Tension Starts and Fragile Temples
What keeps fine baby hairs intact during a weave or wig application? Stylists start each row with the client’s natural strands before introducing extension hair. Adding synthetic or human bundles too close to the front stresses the follicle root. For individuals managing postpartum thinning or sparse temples, plaiting with gentle finger placement creates a secure, flat base without mechanical stress.
You should never need pain relievers after getting your hair braided.
- Can you raise your eyebrows, smile, and blink comfortably immediately after the service?
- Is the scalp completely clear of redness or tiny white folliculitis bumps around the hair roots?
- Does the hairline rest flat against the forehead without visible skin tenting at the braid bases?
Anchor Cornrows for Glueless Units
Glueless wigs rely on internal combs and adjustable bands for stability, yet sliding clips directly into unreinforced perimeter hair leads to breakage. Creating two low-stress horizontal cornrows roughly two inches back from the ear tabs gives clips a reinforced base. The combs bite securely into these interior anchor braids (sparing your real edges from friction), which keeps the unit anchored through active daily routines.
Scalp Care Under Wig Installs: Preserving the Scalp Microbiome
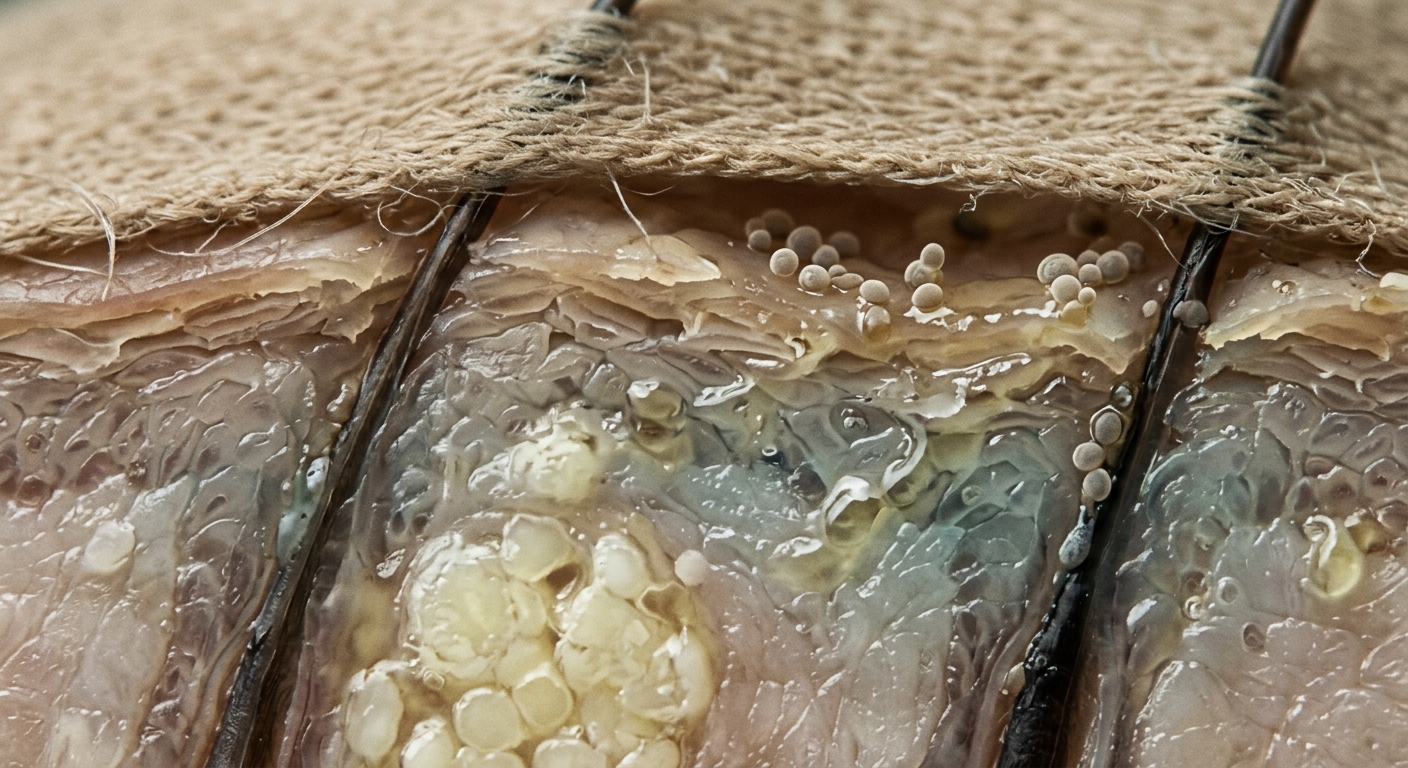
Trapping natural hair under an occlusive wig cap creates an environment where sebum and dead skin cells accumulate rapidly. That buildup disrupts your skin barrier. Have you ever removed an install only to find tender, flaking skin? Preventing that irritation begins with intentional preparation before the parting comb ever touches your crown.
Clarifying and Hydrating the Scalp Before the First Braid
A clean install requires a purified canvas. Wash with a chelating or clarifying shampoo to dissolve old adhesive and silicone residue, then follow immediately with a lightweight leave-in spray to restore hydration (oil alone cannot moisturize dry strands). Clean follicles breathe easier. Never braid damp hair. Trapped moisture inside dense cornrows encourages Malassezia yeast proliferation, which causes flaking and sour odor.
Antimicrobial Care and Safe Wear Limits
Wider, deliberate gaps between cornrows allow air to reach the skin while offering direct access for targeted care. Apply a few drops of antimicrobial tea tree oil directly along those exposed partings once a week, keeping the solution off the braid bodies so the hair does not swell. Wear schedules require firm boundaries:
- Cleanse exposed parts weekly with witch hazel on a cotton swab.
- Limit any braid down foundation to a maximum wear window of six weeks.
- Give your scalp forty-eight hours of open rest between installs.
Selecting the right pattern depends heavily on your chosen style, whether you wear a glueless front, deep parting closure, or a traditional sew-in.
Step-by-Step Pre-Braid Preparation and At-Home Maintenance
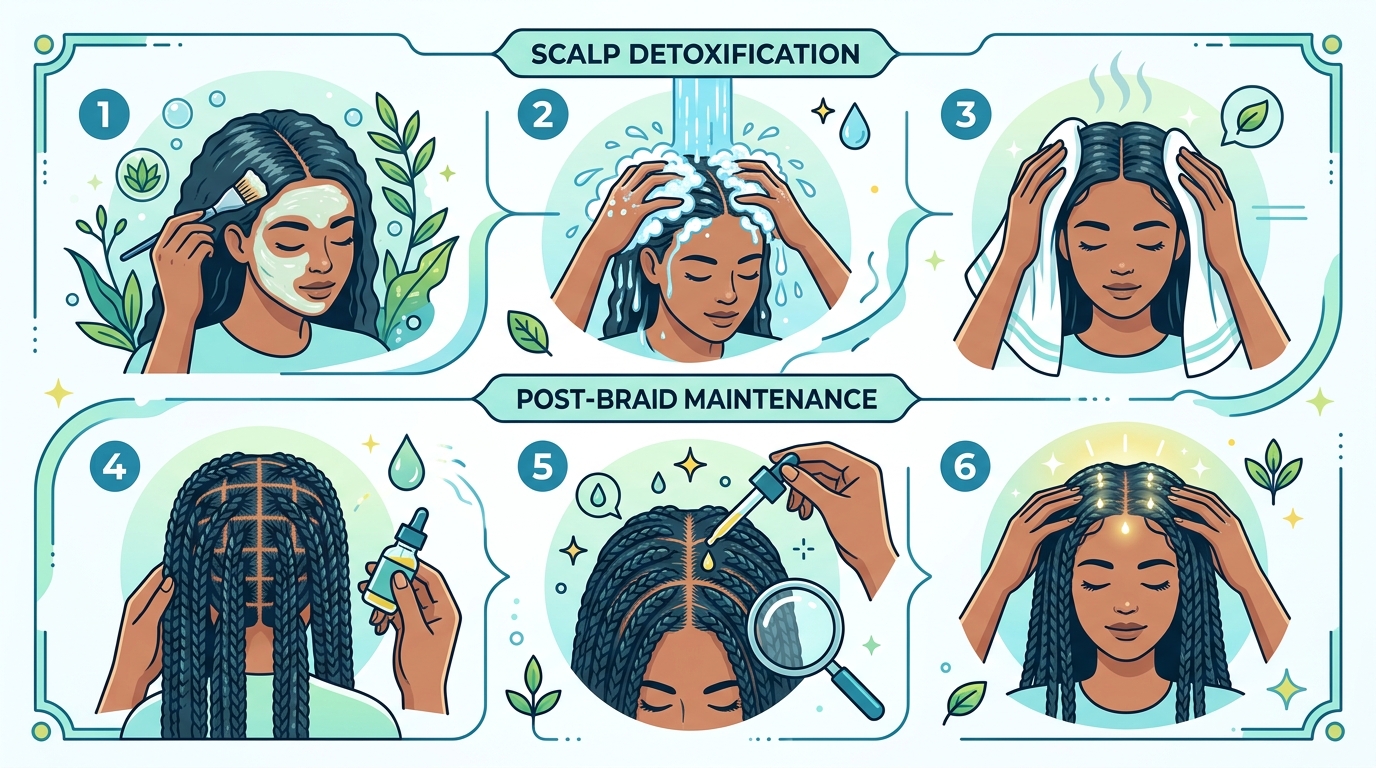
Proper groundwork extends the life of your hairstyle and protects the moisture balance of your scalp. Follow this structured routine before arriving at your appointment and during the weeks your hair remains tucked away.
Pre-Appointment Hair Preparation Checklist
- Detoxify the scalp with an apple cider vinegar rinse or clarifying wash to strip old bonding agents and heavy mineral buildup.
- Apply a protein-moisture balanced deep conditioning mask under a hooded dryer for twenty minutes to reinforce strand elasticity.
- Rinse thoroughly with cool water to seal cuticle layers, preventing sudden moisture loss under heated wig caps.
- Apply a water-based leave-in conditioner enriched with aloe vera across your damp lengths.
- Blow-dry the hair on medium heat using a tension brush method until the roots are completely dry and stretched.
At-Home Maintenance Between Appointments
- Target the exposed scalp lanes three times each week with a lightweight, jojoba-based herbal oil applied via a precision nozzle.
- Blot sweat immediately after gym sessions with an absorbent microfiber cloth, then let your roots air-dry under a fan before putting your wig back on.
- Wipe down hairline tracks with an alcohol-free witch hazel toner to break up daily makeup transfer without stripping skin moisture.
- Sleep in a satin bonnet or use a mulberry silk pillowcase to prevent coarse cotton fibers from leaching moisture from your nape plaits.
- Schedule a full takedown, thorough detangle, and trim when your foundation reaches four to six weeks of continuous wear.
Customized Braid Patterns: Matching Foundations to Your Install Type
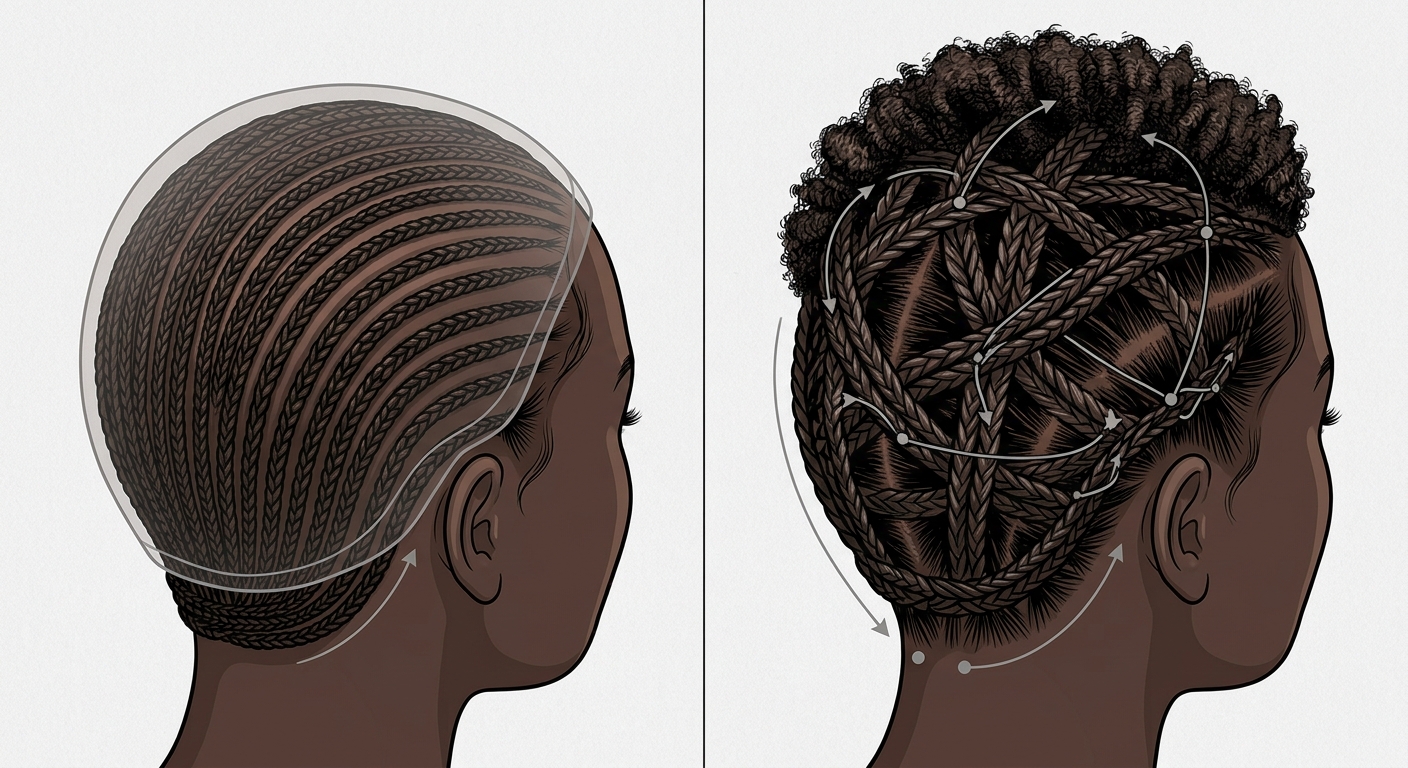
Different installations demand completely different structural bases. What works beneath a daily glueless wig will fail under a traditional sew-in weave that must hold heavy bundles for two months.
Straight-Backs vs. Beehive Patterns for Wigs and Sew-Ins
Straight-back micro-cornrows create the flattest base for lace front wigs and glueless units because they direct hair backward along the natural curve of the cranium. To avoid the telltale ridge at the base of the skull, stylists interlock the tail ends or fold them flat against adjacent tracks. In contrast, circular beehive patterns work well for full closures or sew-ins where you want continuous track placement. Which style matches your daily routine? Daily gym sessions and heavy perspiration make straight-backs far easier to wash, rinse, and dry thoroughly while your hair remains braided.
Zig-Zag Cross-Overs and Perimeter Reinforcements
Thick, dense 4C hair often creates excess bulk when braided in uniform lines. A zig-zag or overlapping cross-over pattern disperses this density horizontally across the scalp rather than stacking it into high ridges. For heavier units, a stylist may add an extra anchor braid so the weight never pulls directly on fragile outer hair.
- Glueless lace units: 10 to 14 micro straight-backs with folded tail ends
- Sew-in weaves: Perimeter anchors with horizontal or beehive tracks for secure stitching
- Dense textures: Cross-over patterns that compress volume across the head
Visiting a dedicated specialist in South Atlanta ensures your foundation stands out from rushed salon work.
Why Book a Professional Braid Down Specialist in Jonesboro and South Atlanta?
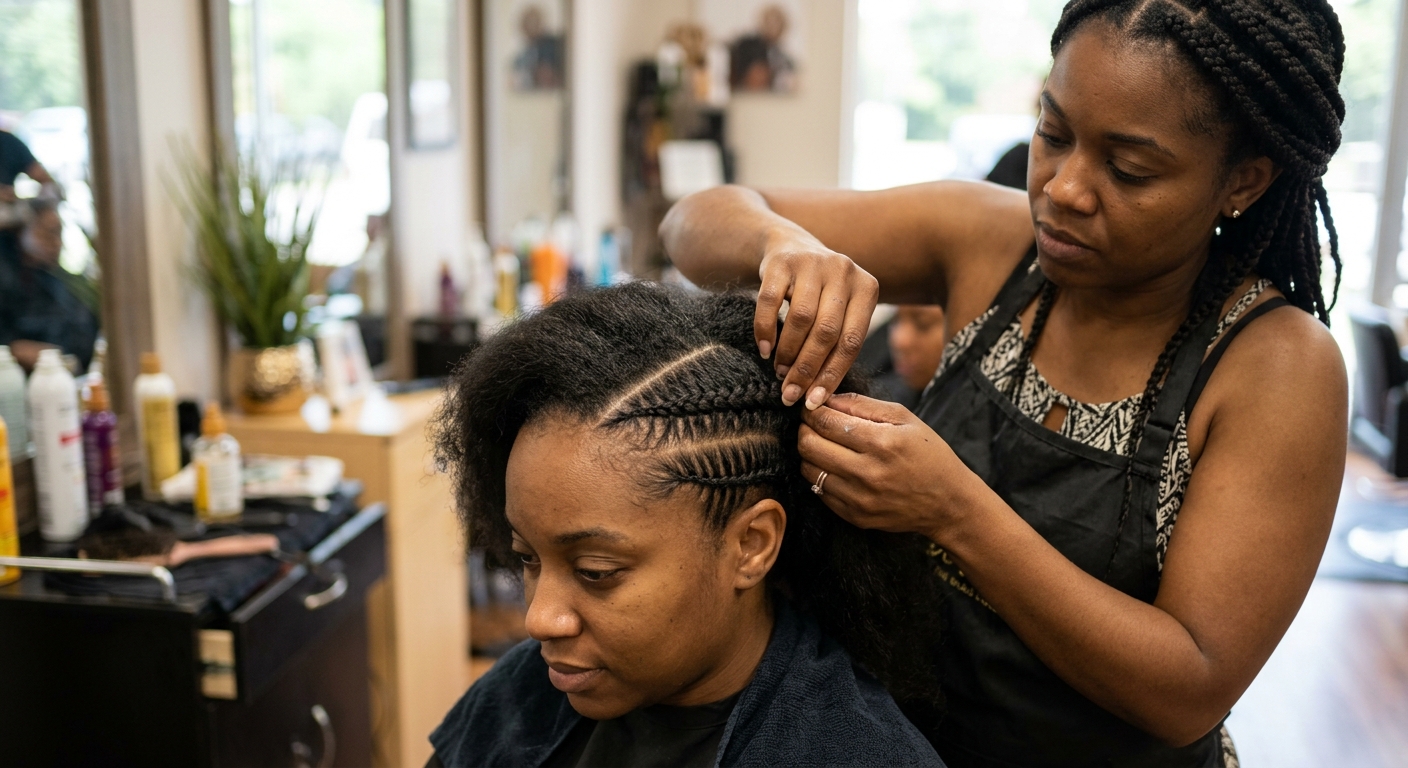
Myth: “Any Braid Down Works Under a Wig Cap”
Thick, hasty cornrows from a standard salon chair (often completed in under twenty minutes) do not support a flat unit. Caps slide. A dedicated cosmetologist treats base braiding as an intentional hair preservation service rather than a rushed preliminary step. Micro-thin tracks follow the natural curves of the skull, which creates an even surface for lace adhesives or silicone grips. Why settle for uneven bulk that forces you to adjust your unit throughout the day? Millimeter-thin rows distribute weight evenly across the scalp.
What to Expect During a Slayy By Che Foundation Session
Every session starts with a quick look at your head shape and hair density. Clients in Henry County do not need to drive into central Atlanta for careful braid down work. Slayy By Che offers braid downs at its private studio in Jonesboro, close to Henry County and South Metro Atlanta. Your stylist calibrates hand tension on every pass, which protects the hair bulb while keeping each braid tail flush.
You leave with a stable base designed for your specific install:
- Symmetrical partings matched to your planned lace parting space
- Calibrated anchor zones mapped across your cranial perimeter
- Folded ends stitched flat without adding crown height
Investing in your hair foundation ensures every install sits flatter, lasts longer, and protects your natural hair beneath.
Frequently Asked Questions
How long does a flat braid down take?
A meticulous braid down service south atlanta appointment typically requires forty-five to seventy-five minutes. Duration depends on your natural hair density, total hair length, and the specific number of plaits needed for your install type. Shampoo and blow dry are not included with a braid down, so arrive with clean, dry, stretched hair.
Can I get a braid down without an install in McDonough?
Yes. Slayy By Che offers the braid down as its own service, so you can wear your own wig at home or take it to the installer of your choice.
How long can I keep my braid down foundation in place?
A foundation braid down should remain in place for four to six weeks. Leaving cornrows tucked underneath adhesive or heavy caps beyond six weeks leads to matted roots, excessive shedding, and scalp inflammation caused by trapped sebum.
How should I wash my hair while in a braid down foundation?
Dilute sulfate-free shampoo in an applicator bottle with warm water. Squeeze the mixture directly down the exposed partings, gently pressing the solution into the plaits with your palms rather than scrubbing vigorously. Rinse thoroughly under low water pressure, blot dry with a microfiber towel, and sit under a hooded dryer until the center core of every braid is completely dry.
What are the pricing expectations for a braid down service south atlanta?
For current braid down pricing, see the price list on the Slayy By Che Services page. A booking deposit is applied to your total, and the balance is due at your appointment.
Protect Your Natural Hair Without Sacrificing a Flat Install
Thick natural hair should never force you to choose between a flat wig silhouette and a healthy hairline. Georgia humidity tests your scalp with sweat and excess moisture, making heavy, bulky cornrows a genuine risk for irritation and fungal buildup. When a stylist maps braids along the anatomical contours of your head (recessing bulk away from the crown and nape), the lace sits flush against your skin without needing pounds of glue. Your edges stay intact.
How many times have you taken down an install only to spot tender red bumps along your temples? That soreness is not a routine price of beauty. Tight braiding damages fragile hair follicles and cuts off local blood flow, which triggers traction alopecia over time. Intentional spacing changes everything. By distributing anchor points evenly and keeping direct pulling force away from your perimeter baby hairs, your natural 4C coils rest comfortably (and continue growing) while hidden away under your cap. Healthy roots matter far more than temporary tightness.
A flat install always begins with the structure beneath the lace. Booking a flat braid down for your wig at slayybyche.com/book-appointment gives your natural hair the right foundation for lasting comfort. Slayy By Che builds every foundation to respect your scalp health first. You deserve a flat unit that feels as gentle as it looks.