
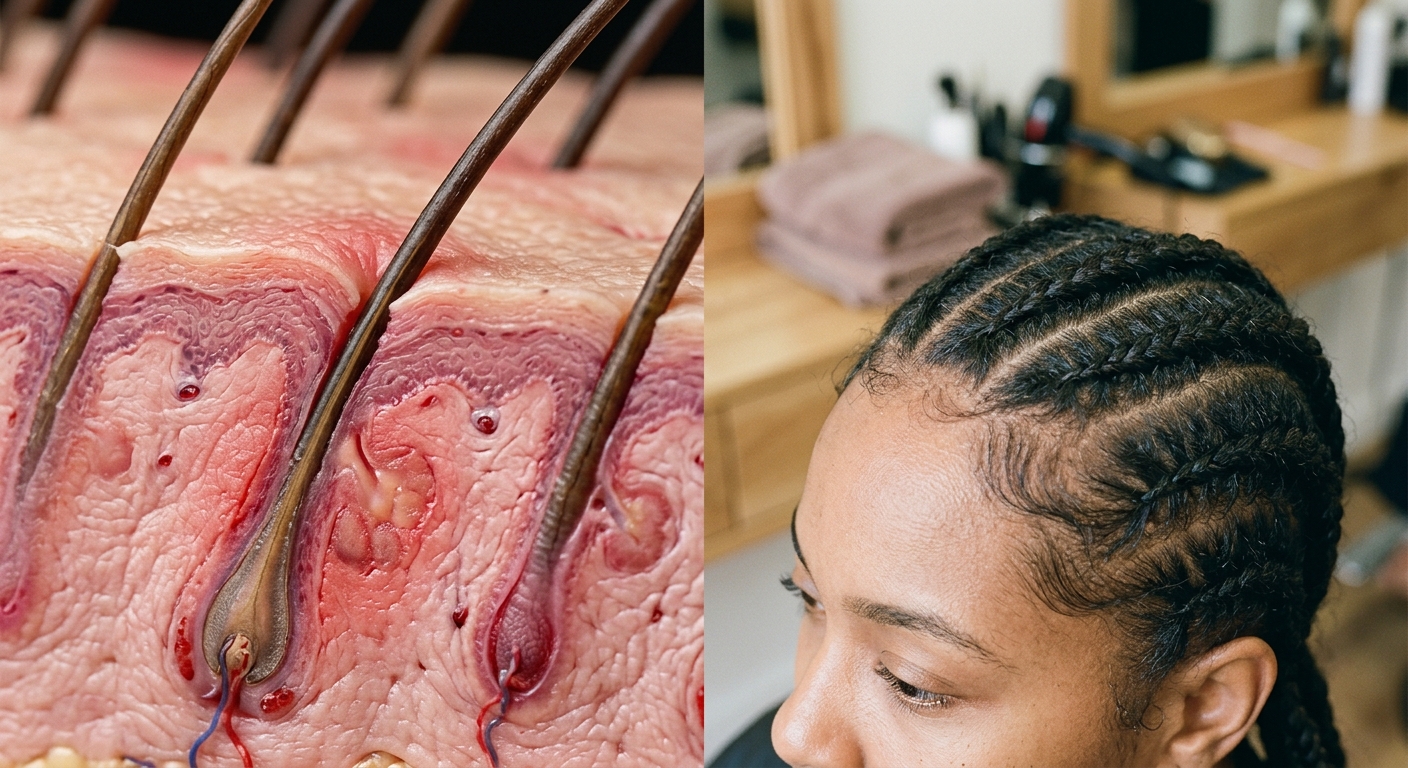
A protective style that strips your edges destroys the very hair it promises to shield. Tight braids around the hairline can lead to traction alopecia, a largely preventable type of hair loss. Tension creates inflammation. Over time, that inflammation leads to permanent hair loss. You need hair braiders that dont pull edges, professionals who treat scalp health as a prerequisite. Knowing how to choose a braider who leaves fragile temple and nape hairs out of tight cornrows is one of the best ways to protect your edges. Here is how proper tension management allows damaged borders to heal.
The Hidden Cost of the Flat Foundation: Understanding Traction Alopecia at the Margins
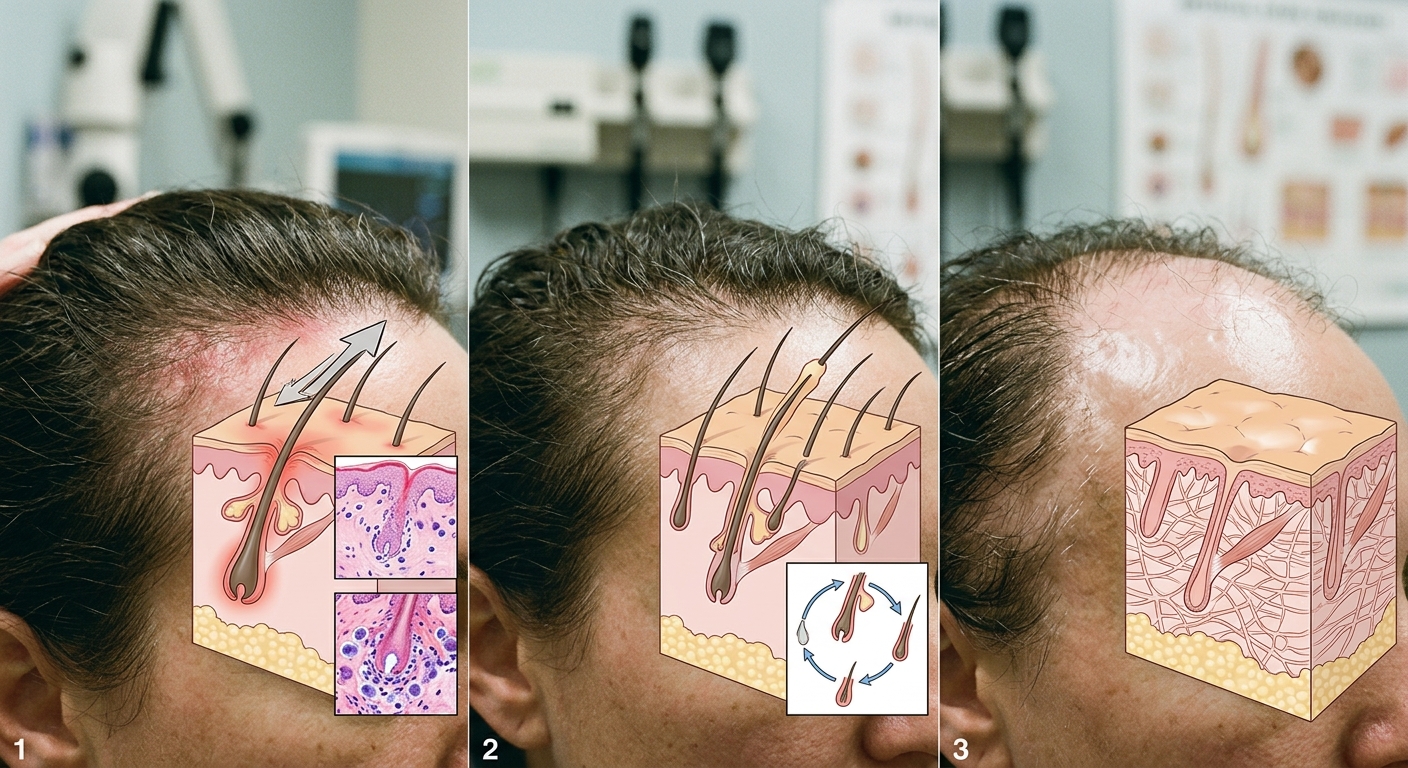
A completely flat braid base often comes at a high physical price. When a stylist braids too tightly to eliminate bulk beneath a unit, the continuous pulling alters hair follicle biology. Constant mechanical tension forces growing hairs out of the anagen (growth) phase and directly into the catagen (regression) phase. Over time, that stress can weaken the follicle and, if it continues, lead to lasting thinning.
The Vulnerability of the Temple and Occipital Boundary
Why do borders vanish first? Hair strands around your temples and the nape of your neck are naturally finer, shorter, and rooted more shallowly than the dense terminal hair at your crown. When tension pulls at these delicate perimeter zones, the anchoring sheath tears away under the scalp. Without immediate relief, localized inflammation produces scar tissue that permanently replaces active follicles.
Recognizing Early Warning Signs
Pain is not proof of a secure install. Tenderness that lasts beyond an hour indicates trouble, especially when accompanied by physical markers:
- Throbbing discomfort that disrupts normal sleep patterns
- Traction folliculitis (small red or white-headed bumps around individual hair shafts)
- A visibly stretched scalp that feels shiny or abnormally tight
- Fine hairs shedding with visible white bulbs attached at the root
These symptoms show that the skin is struggling under direct trauma. Understanding this biological threshold clarifies why booking hair braiders that dont pull edges is a health requirement rather than a cosmetic luxury.
What Makes Hair Braiders That Don’t Pull Edges Radically Different
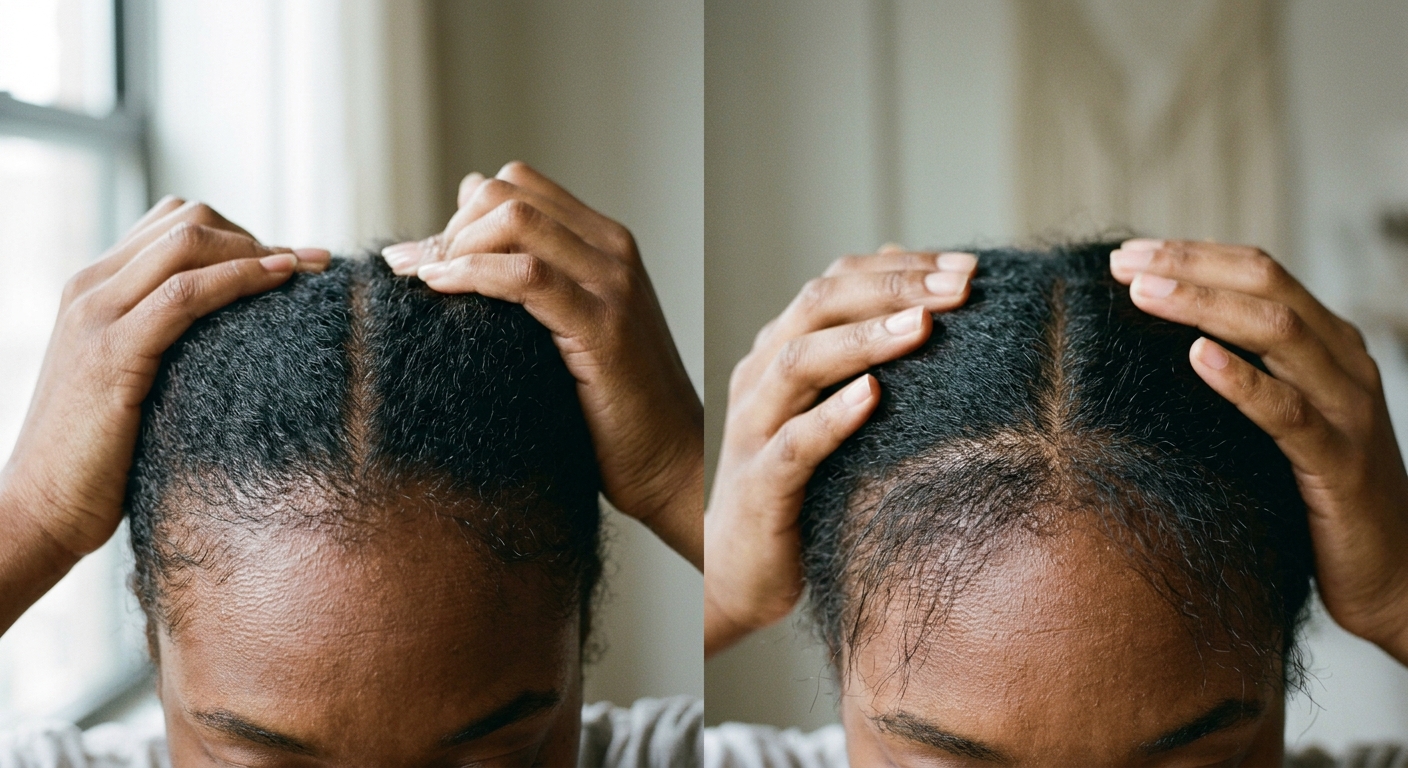
Finding hair braiders that do not pull edges requires unlearning old salon habits. For decades, traditional styling culture insisted that braids must hurt to look neat. Clients accepted throbbing scalps and sleepless nights as the unavoidable tax for a sleek style. That assumption destroys fragile margins.
Myth vs. Fact: Flattest Does Not Mean Healthiest
Many people assume a wig foundation must feel painfully tight to lay flat against the scalp. That belief is false. A natural lay comes from clean parting lines and disciplined placement (not raw pulling force). When an operator yanks the perimeter taut to secure a wig clip, mechanical shear stress concentrates squarely on fragile baby hairs. Braiders focused on hair preservation use perimeter-relief techniques instead. They leave the hairline completely untouched.
Cosmetology Licensing and Weight Distribution
What separates an aggressive braider from a licensed professional? Formal training in scalp anatomy makes the difference. Speed-driven braiders often rely on tight perimeter rows because pulling the hair hard creates a quick base. In contrast, licensed professionals understand that saving the hairline requires moving structural tension inward.
Careful braiders adjust the traditional base to protect thinning edges:
- They leave the fine, low-density hairs along the temples and nape completely out of the cornrows.
- They anchor wig combs and thread into denser interior sections where the scalp tolerates weight.
- They apply uniform hand tension rather than single-point pulling.
This perimeter-free foundation keeps the hairpiece stable while giving delicate margins room to regenerate.
Standard Salon Installation vs. Perimeter-Relief Braid Down
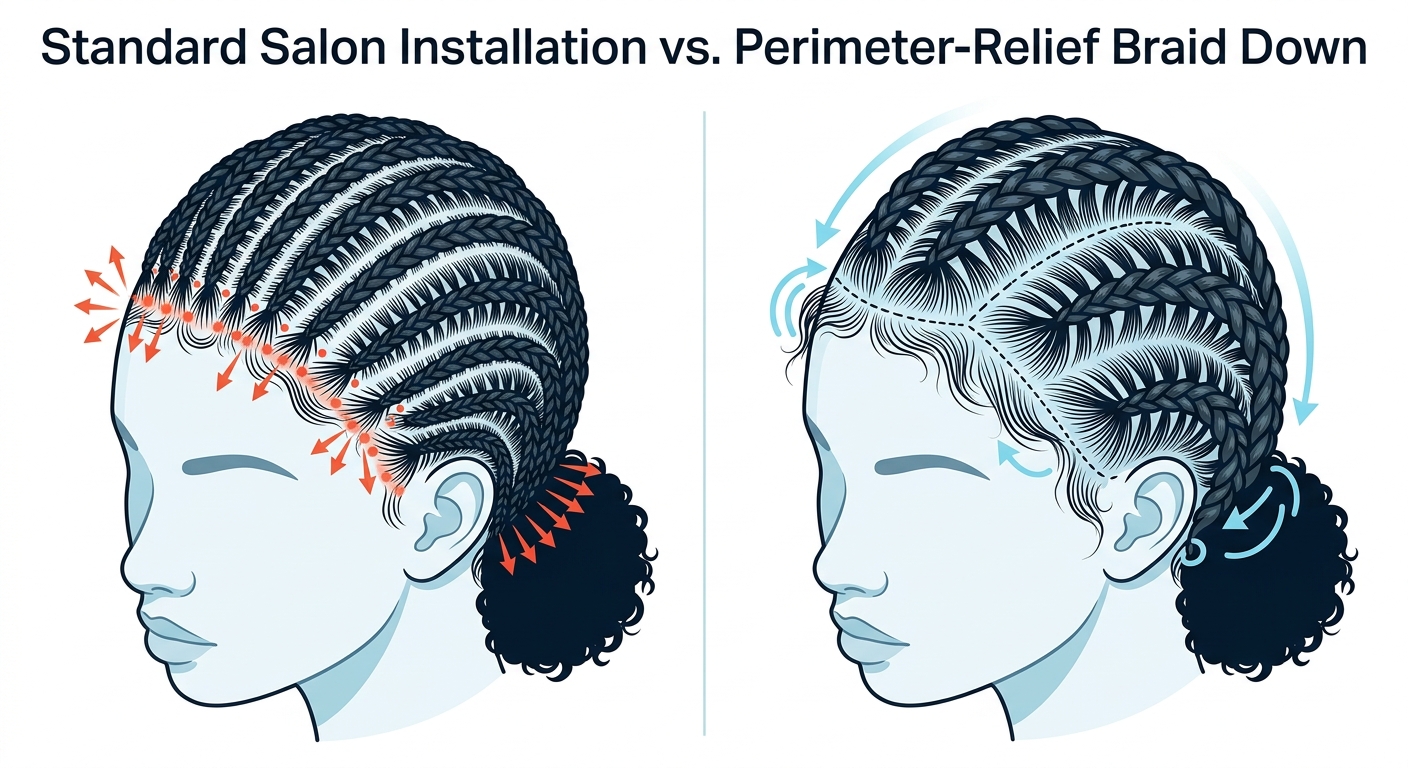
Comparing standard salon methods to perimeter-relief engineering reveals why traditional methods cause repeated hairline trauma:
Standard Salon Installation:
- Hairline Handling: Grips the finest baby hairs along the forehead and temples directly into perimeter cornrows.
- Tension Source: High mechanical tension pulled outward toward the edges to create a flat silhouette.
- Weight Bearing: Attaches heavy wig combs, clips, or sew-in thread directly along edge rows.
- Follicle Impact: High risk of traction folliculitis, root tearing, and permanent scarring.
- Nape Care: Braids fragile baby hairs at the base of the skull into tight horizontal or vertical tracks.
Perimeter-Relief Braid Down:
- Hairline Handling: Leaves one to two inches of fragile perimeter hair loose and completely untouched.
- Tension Source: Uniform, low tension centered across the dense crown of the head.
- Weight Bearing: Anchors all sew-in thread and wig combs onto interior, high-density base braids.
- Follicle Impact: Follicles remain in the active anagen growth phase without mechanical disruption.
- Nape Care: Leaves the bottom boundary loose to allow normal neck movement without friction.
Illustrative Scenario: Restructuring the Braid Down for Damaged Temples and Nape
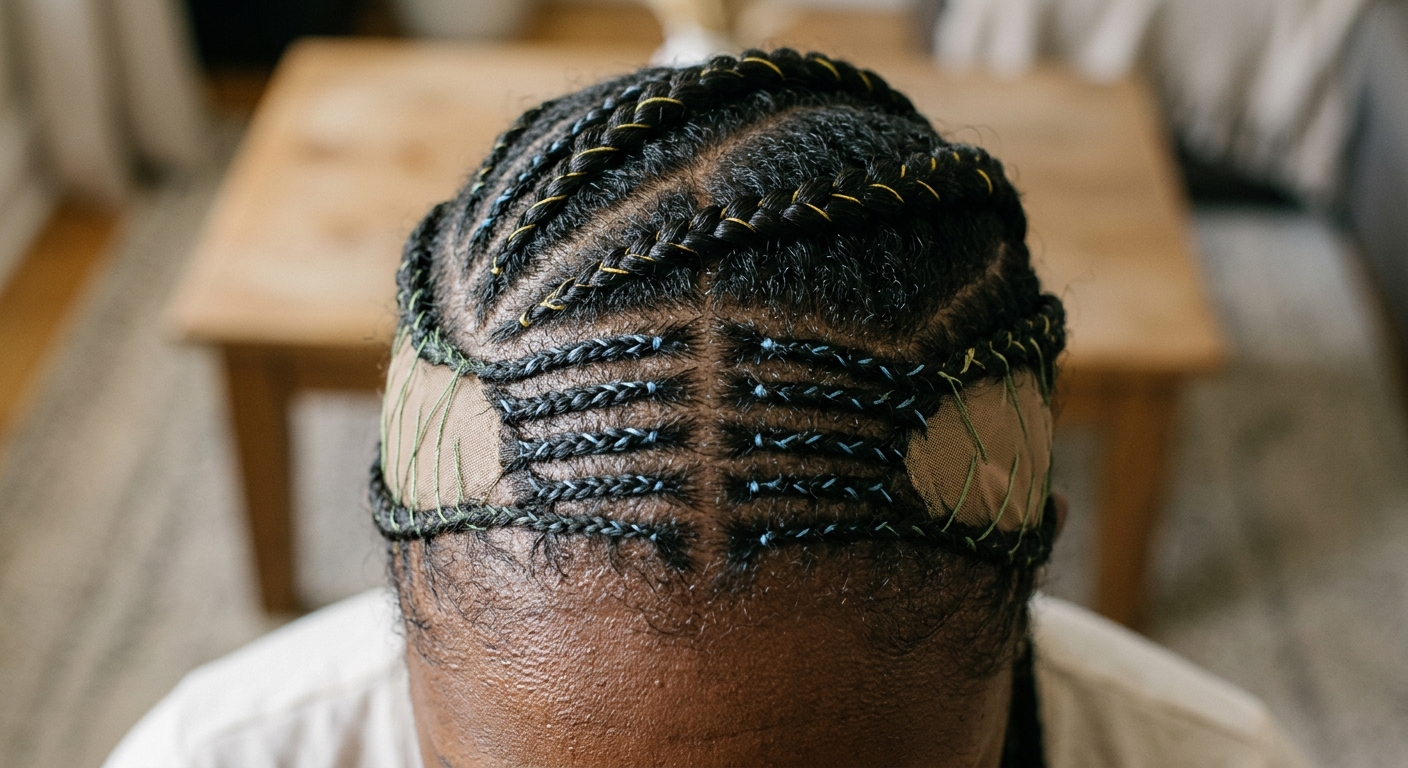
Consider an illustrative client with sparse nape margins after months of tight sew-ins. She still wants to wear protective units. But how can an expert attach a piece securely without continuing the cycle of damage? Licensed hair braiders treat this as an architectural challenge rather than a cosmetic cover-up. A stylist assesses baseline tension tolerance across every zone before picking up a comb.
Assessing Perimeter Weakness and Shear Stress
Standard salon installations anchor the perimeter track right against baby hairs at the nape. This placement creates constant shear stress whenever normal neck movement tugs the unit upward. A careful stylist sets those fragile areas aside first, leaving delicate temple and nape hair out of the cornrows.
The Architectural Shift: Repositioning Anchor Rows
Primary foundation cornrows begin inward where the scalp is thick and follicles are resilient. By anchoring the foundation against the occipital bone, the wig stays secure without exerting force on the perimeter.
The client maintains this layout across a normal wear cycle of four to six weeks. During this period:
- Miniaturized hairs rest undisturbed beneath a protective silk barrier.
- Local blood flow continues without mechanical disruption.
- Edge density recovers steadily over successive installs.
Safe installations prove that a flat, believable profile never requires sacrificing hairline health.
Foundation Engineering: How to Safely Anchor Protective Units Without Edge Tension
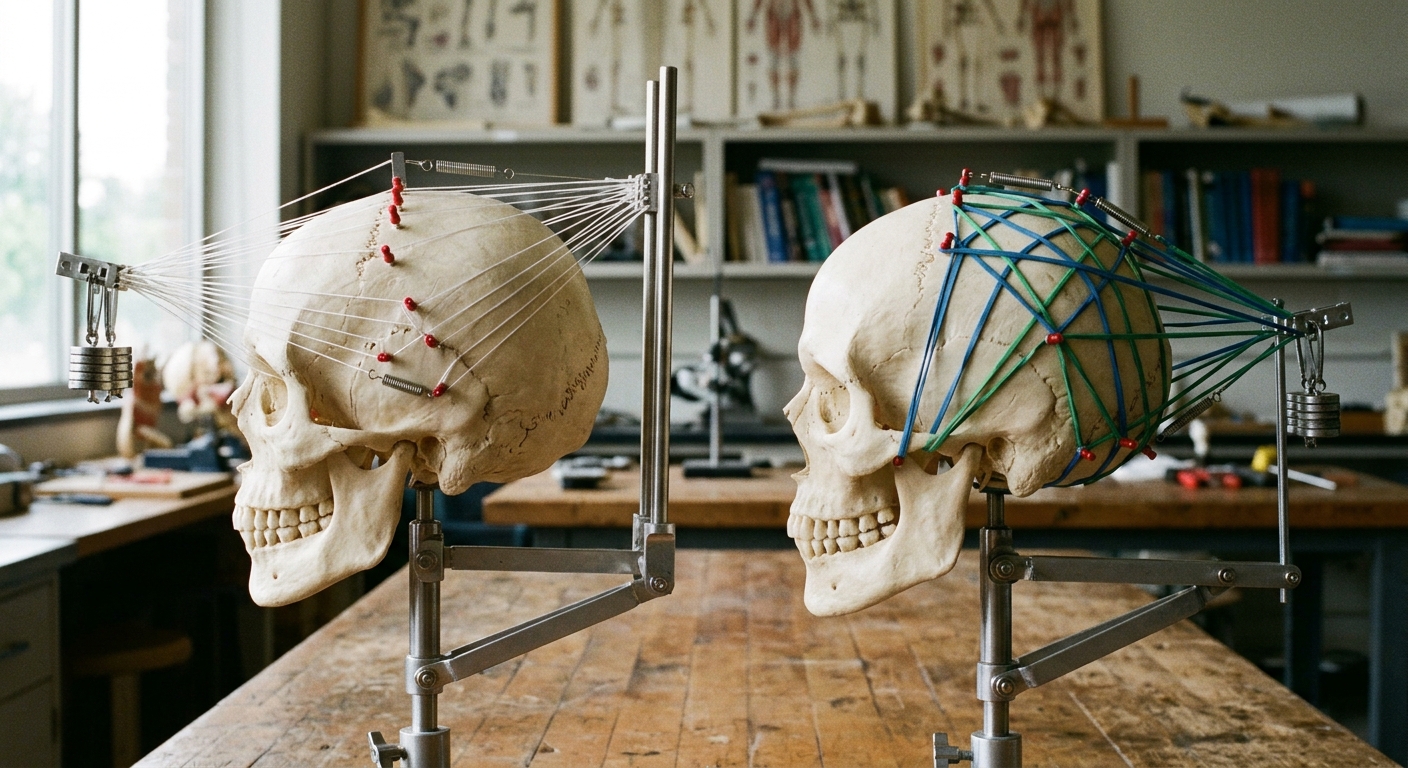
Wigs need stability. When braiders construct a base for a unit, they frequently anchor the heaviest parts of the lace or weft directly along delicate baby hairs at the forehead and the nape of the neck. That practice destroys fragile follicles. Professional hair braiders construct an internal suspension system instead of relying on vulnerable borders.
Step 1: Mapping the Perimeter Relief Zone
The first step isolates the delicate perimeter entirely (leaving a clear margin around both ears, temples, and the lower neck). A stylist clips these fragile strands away before parting the main pattern. These baby hairs are never braided into cornrows; they rest loose or soften under a lightweight butter. What supports the front of the wig instead? Curved rows placed two fingers back from the natural margin bear the physical load.
Step 2: Securing Units to Structural Cores
Horizontal tracks running across the crown absorb the physical weight of the hairpiece. When stitching a unit or sliding wig combs into position, the attachment points must connect through these thick, central plaits.
- Insert combs horizontally into dense mid-scalp rows rather than downward into the hairline.
- Knot thread around interior braids to distribute weight evenly across the top of the head.
- Position elastic bands behind the ears to prevent forward drag against the forehead.
This structural design ensures that downward drag never reaches fine edge hairs during daily movement. Having the right structural pattern is essential, but ensuring your daily habits support regeneration is equally critical.
Nape and Temple Defense: At-Home Care While Wearing Protective Styles
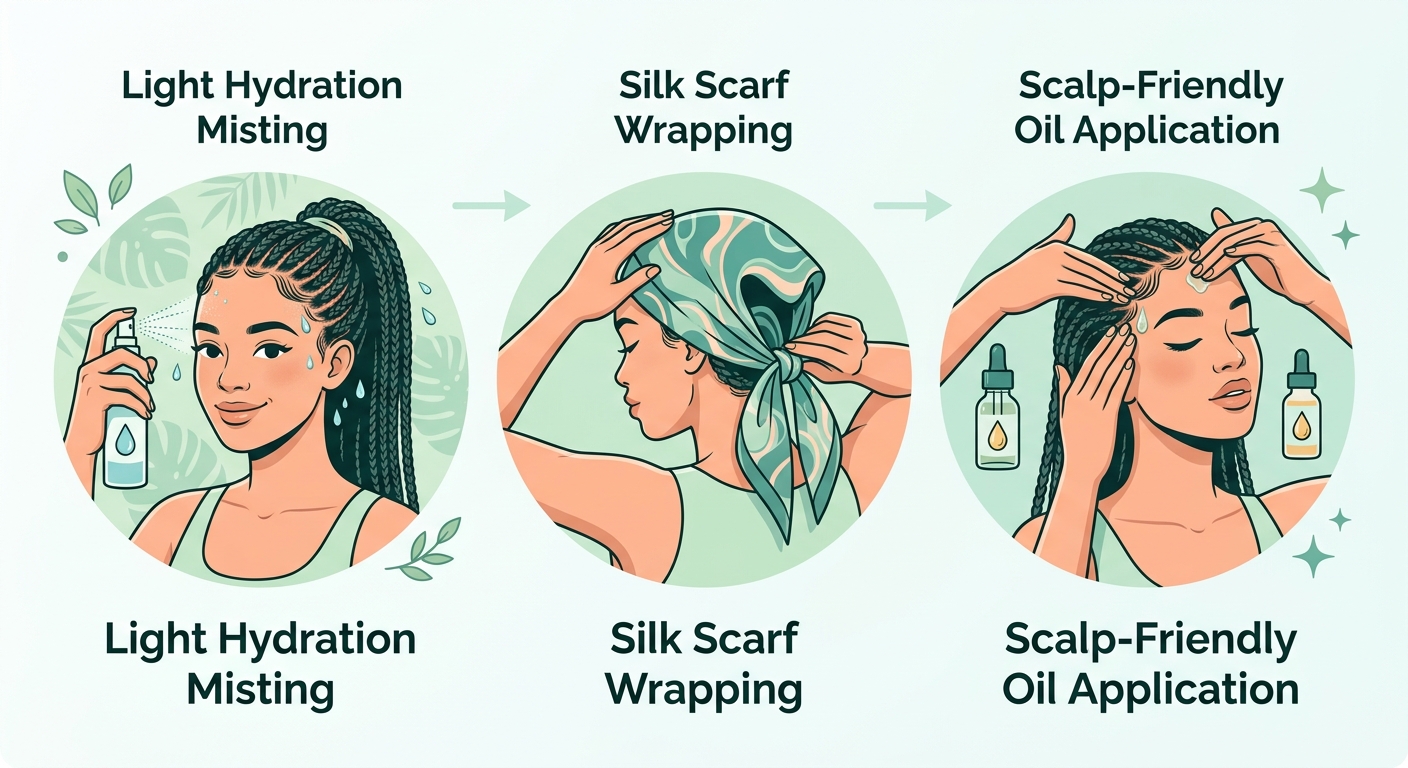
Leaving perimeter hair unbraided shields it from mechanical pulling, but exposed edges still demand active daily maintenance. Dry hair snaps under the slightest contact. Do not ignore your margins simply because they sit outside the main braid structure.
Daily Moisture Strategies for Exposed Perimeters
What does that routine look like in daily practice? Mist the hairline lightly with pure water or an aloe spray each morning. Pat two drops of lightweight plant oil (such as jojoba or squalane) over the damp skin to seal the moisture without clogging pores. At night, cover your edges with a satin scarf or bonnet to reduce friction.
Friction control is just as important as hydration. Rigid plastic combs and sticky silicone bands abrade fragile nape hairs as your neck bends throughout the day. Replace them with a velvety fabric wig grip, and wrap your head in a smooth satin bonnet or silk scarf every night.
Ingredient Breakdown: What Heals Follicles vs. What Clogs Them
Heavy styling products on fragile edges can clog the scalp and cause buildup. Choose ingredients that calm inflammation rather than suffocating follicles under petroleum:
- Jojoba Oil: Mimics natural sebum, lubricating the hair shaft without blocking oxygen exchange.
- Squalane: Provides lightweight lipid replenishment for dry, flaky patches along the temples.
- Rosemary Extract: Encourages microcirculation around resting follicles when diluted properly.
- Avoid Heavy Petrolatum and Mineral Wax: These trap bacteria and sweat against sensitive follicle openings, increasing the risk of folliculitis under wig caps.
Scalp Signals That Require Immediate Adjustment
Pain is an alarm bell, never an acceptable byproduct of neat styling. Inspect your scalp in a mirror twice a day during the first week. Loosen or remove the surrounding braid anchors immediately if you observe any of the following warnings:
- Throbbing headaches that persist past the styling chair
- Small red bumps or white pustules forming around braid bases
- Visible tenting, where the scalp skin pulls upward around individual hair groupings
Cutting a thread or undoing an overtight braid early might feel inconvenient, but protecting your living follicles always outranks preserving an install.
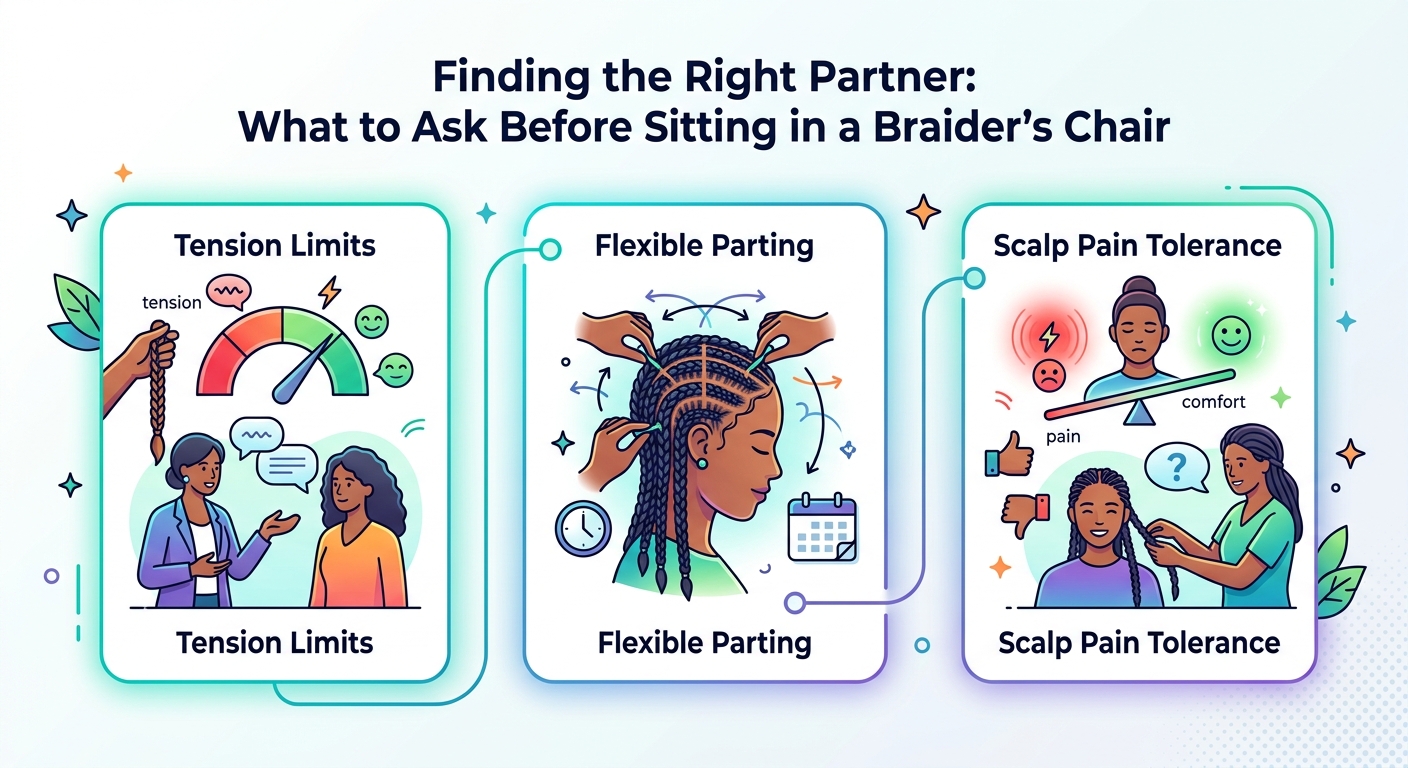
Finding the Right Partner: What to Ask Before Sitting in a Braider’s Chair
Braiders often treat installation speed as their main selling point, yet rapid hand speed frequently sacrifices hair health. You have every right to interview a braider before any comb touches your scalp.
Silence does not protect your roots.
Consultation Screening and Warning Signs
Start by observing how a practitioner reacts when you outline specific scalp boundaries. Do they listen attentively, or do they dismiss your concerns as an inconvenience?
- Ask about tension boundaries: “Are you willing to leave fine hairs out along my hairline without pulling extensions tightly against them?”
- Test parting flexibility: Refusal to enlarge parting sections around fragile zones signals a rigid, assembly-line mindset.
- Assess pain attitudes: Any braider who claims that headaches and burning skin are normal should not touch your head.
Acute pain is an alarm bell, not a prerequisite for longevity.
Why Working with a Clayton County Specialist Protects Your Follicular Future
Hiring a licensed Georgia cosmetologist brings strict accountability that informal braiders rarely provide. State board licensing requires rigorous sanitation protocols alongside formal training in skin and hair anatomy (including the detection of early traction disorders). A dedicated specialist in Clayton County pairs artistic execution with clinical understanding of follicular limits. These professionals evaluate strand density before selecting hair extension bundles, ensuring the added weight matches what your roots can bear. With professional guidance and foundation techniques, recovering your perimeter while enjoying protective styles is completely within reach.
Frequently Asked Questions
Can Damaged Edges Grow Back?
Damaged edges can regenerate if the follicle has not formed scar tissue. In the early stages of traction alopecia, the hair root experiences localized inflammation and stress without permanent destruction. When tension is removed early, hair often has a chance to grow back, though timing varies from person to person. If the area looks shiny, smooth, and completely devoid of follicle pores, scarring may have occurred. A dermatologist can examine your scalp and tell you whether the hair is likely to grow back.
How Long Does Tension Alopecia Take to Reverse?
Tension-induced thinning typically requires three to six months of uninterrupted recovery before visible density returns. Hair strands grow approximately one-half inch per month under healthy conditions. During the initial eight weeks of wearing a perimeter-relief braid down, your primary goal is halting further shedding. Recovery is gradual and different for everyone, so check in with a dermatologist if you see no improvement. Maintaining consistent moisture and zero mechanical pull is necessary throughout this timeline to avoid resetting progress.
What Should I Do If My Braids Hurt the First Night?
Take action immediately if your braids cause sharp pain, throbbing, or insomnia on the first night. Wetting the braids with warm water or applying leave-in conditioner will not relieve structural overtightening. Carefully snip the attachment thread or unbraid the specific rows causing localized tenting along your temples or nape. Contact your stylist the next morning to loosen the anchors. A qualified braider will adjust the tension without charging you for a correction or questioning your discomfort.
Reclaiming Your Edges Without Giving Up Protective Styles
A protective hairstyle loses its entire purpose the moment it pulls your hairline out by the root. Scar tissue does not grow hair. Why trade permanent follicle viability for two weeks of flat, slicked margins? Shifting your anchor rows just one half-inch inward removes direct shear stress from fragile temple and nape perimeters, creating an insulated border where damaged follicles can enter undisturbed anagen regrowth (the primary growth stage of the hair cycle). Removing tension early gives your edges the best chance to recover.
Severe pulling never creates neatness; it creates hair loss. You can wear braided styles without sacrificing thin strands along your neck and temples. At Slayy By Che, Che focuses on gentle, tension-free braiding that respects your scalp. You can share any concerns about your edges during the brief consultation when your appointment is confirmed. Book your tension-free appointment at slayybyche.com/book-appointment to protect your hairline.